Browsing Category

Home Design + Decor

Fashion + Style Home Design + Decor

Shades of Green

March 17, 2017

green accessories, green home accessories, green clothing

Partially inspired by St. Patrick’s Day, this post is also inspired by a color palette I’ve really been drawn to lately. A few green wardrobe items have been in my closet for awhile, but I’ve also picked up a couple more lately. I love green home accessories as well. Jewel tones are probably my favorite shade, but I don’t really discriminate! Greenery is the 2017 PANTONE color of the year, and I love the natural feel it brings to a space. I’m heavily leaning on painting some cabinets a moody green color in the #lucasfamilyhome. My husband thinks I’m crazy! Stay tuned to see if I get my way. šŸ˜‰ I really need to make that decision in the next week or so.

Here are a couple of green items that I already have in my closet and a few more to get the wheels turning for you. Happy St. Patrick’s Day! Cheers!

1 | 2 | 3 | 4 | 5| 6 | 7 | 8 | 9


Home Design + Decor

Solid Wood Flooring

January 18, 2017

I’m finally getting around to sharing another update on the home front. I have held off a little because it doesn’t look like there’s been much progress since it’s just a lot of little things have been going on behind-the-scenes but if you catch up on my home updates, read here.Ā  Painting prep is starting this week, but thought I’d give a little update on the wood floors since this was such a big milestone in the home building process. You may have seen me post a picture on Instagram about the wood floor prep.

Step 1: Fill in low spots on the concrete slab with self leveling concrete

Step 2: Cover concrete with hot tar to seal the slab from moisture and then lay down 2×4’s perpendicular to final wood floor orientation to provide a nailing surface.

Step 3: Plane (sand) 2×4’s perfectly level.

Step 4: Lay out wood floor and start nailing it down.

Step 5: Climatize house (let the air or heat run for two weeks in the house) to bring moisture in the wood down to what it will be while we live in the house.

Step 6: Sand floors, fill in any holes or imperfections and stain.

We need to be on step 5 at this point but we’re waiting on the gas line to be hooked up so we can have heat. A bit of poor planning on the part of our builder, and we’re a little frustrated to say the least.Ā  As you can see, a lot of steps go into putting solid wood floors. I love the wide-plank floor boards we went with. I am a little on the fence regarding staining. I lean more toward a traditional stain, but the white-washed floor is so pretty, too. I have heard from many people they like this raw wood look. What do you think?

We’re testing out some different stains this week to figure out the look we want. So. Many. Decisions.

More soon!

Disclosure: My handy husband helped with explaining these steps to me so I must give credit. šŸ˜‰


Wood Floor-3 Wood Floor-2 Wood Floor Wood Floor-5 Wood Floor-4 Wood Floor-7 Wood Floor-10 Wood Floor-8

Save

Save

Save

Save

Save

Save

Home Design + Decor

Tile, tile and more tile

January 3, 2017

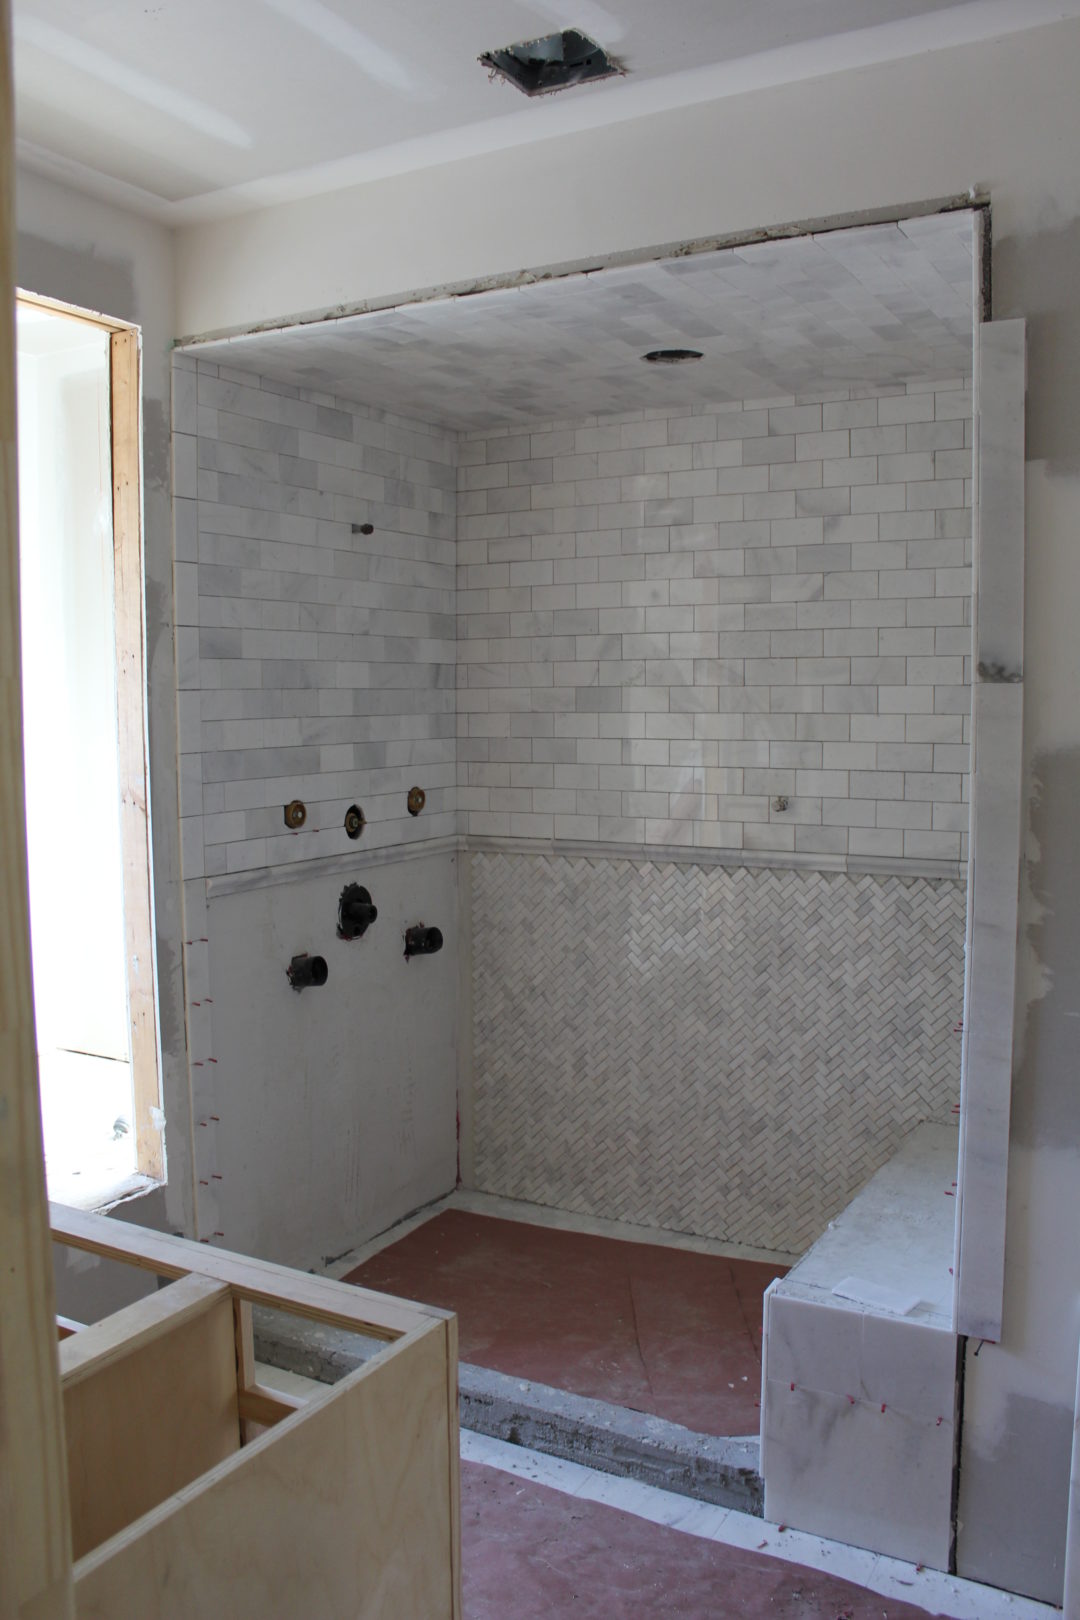
Master Shower: We used snow white marble which is similar to carrara marble, but it has a higher quartz content so it makes it more durable and the color is more uniform, which I realized I liked more and more after staring at tile for HOURS. We used 3×6 subway on the ceilings and walls, 1×2 herringbone on the lower walls and 2 inch hex on the floor, which isn’t pictured. I’m really happy with the look overall. The showers are covered and taped now so all the sanding and painting mess doesn’t get on them.

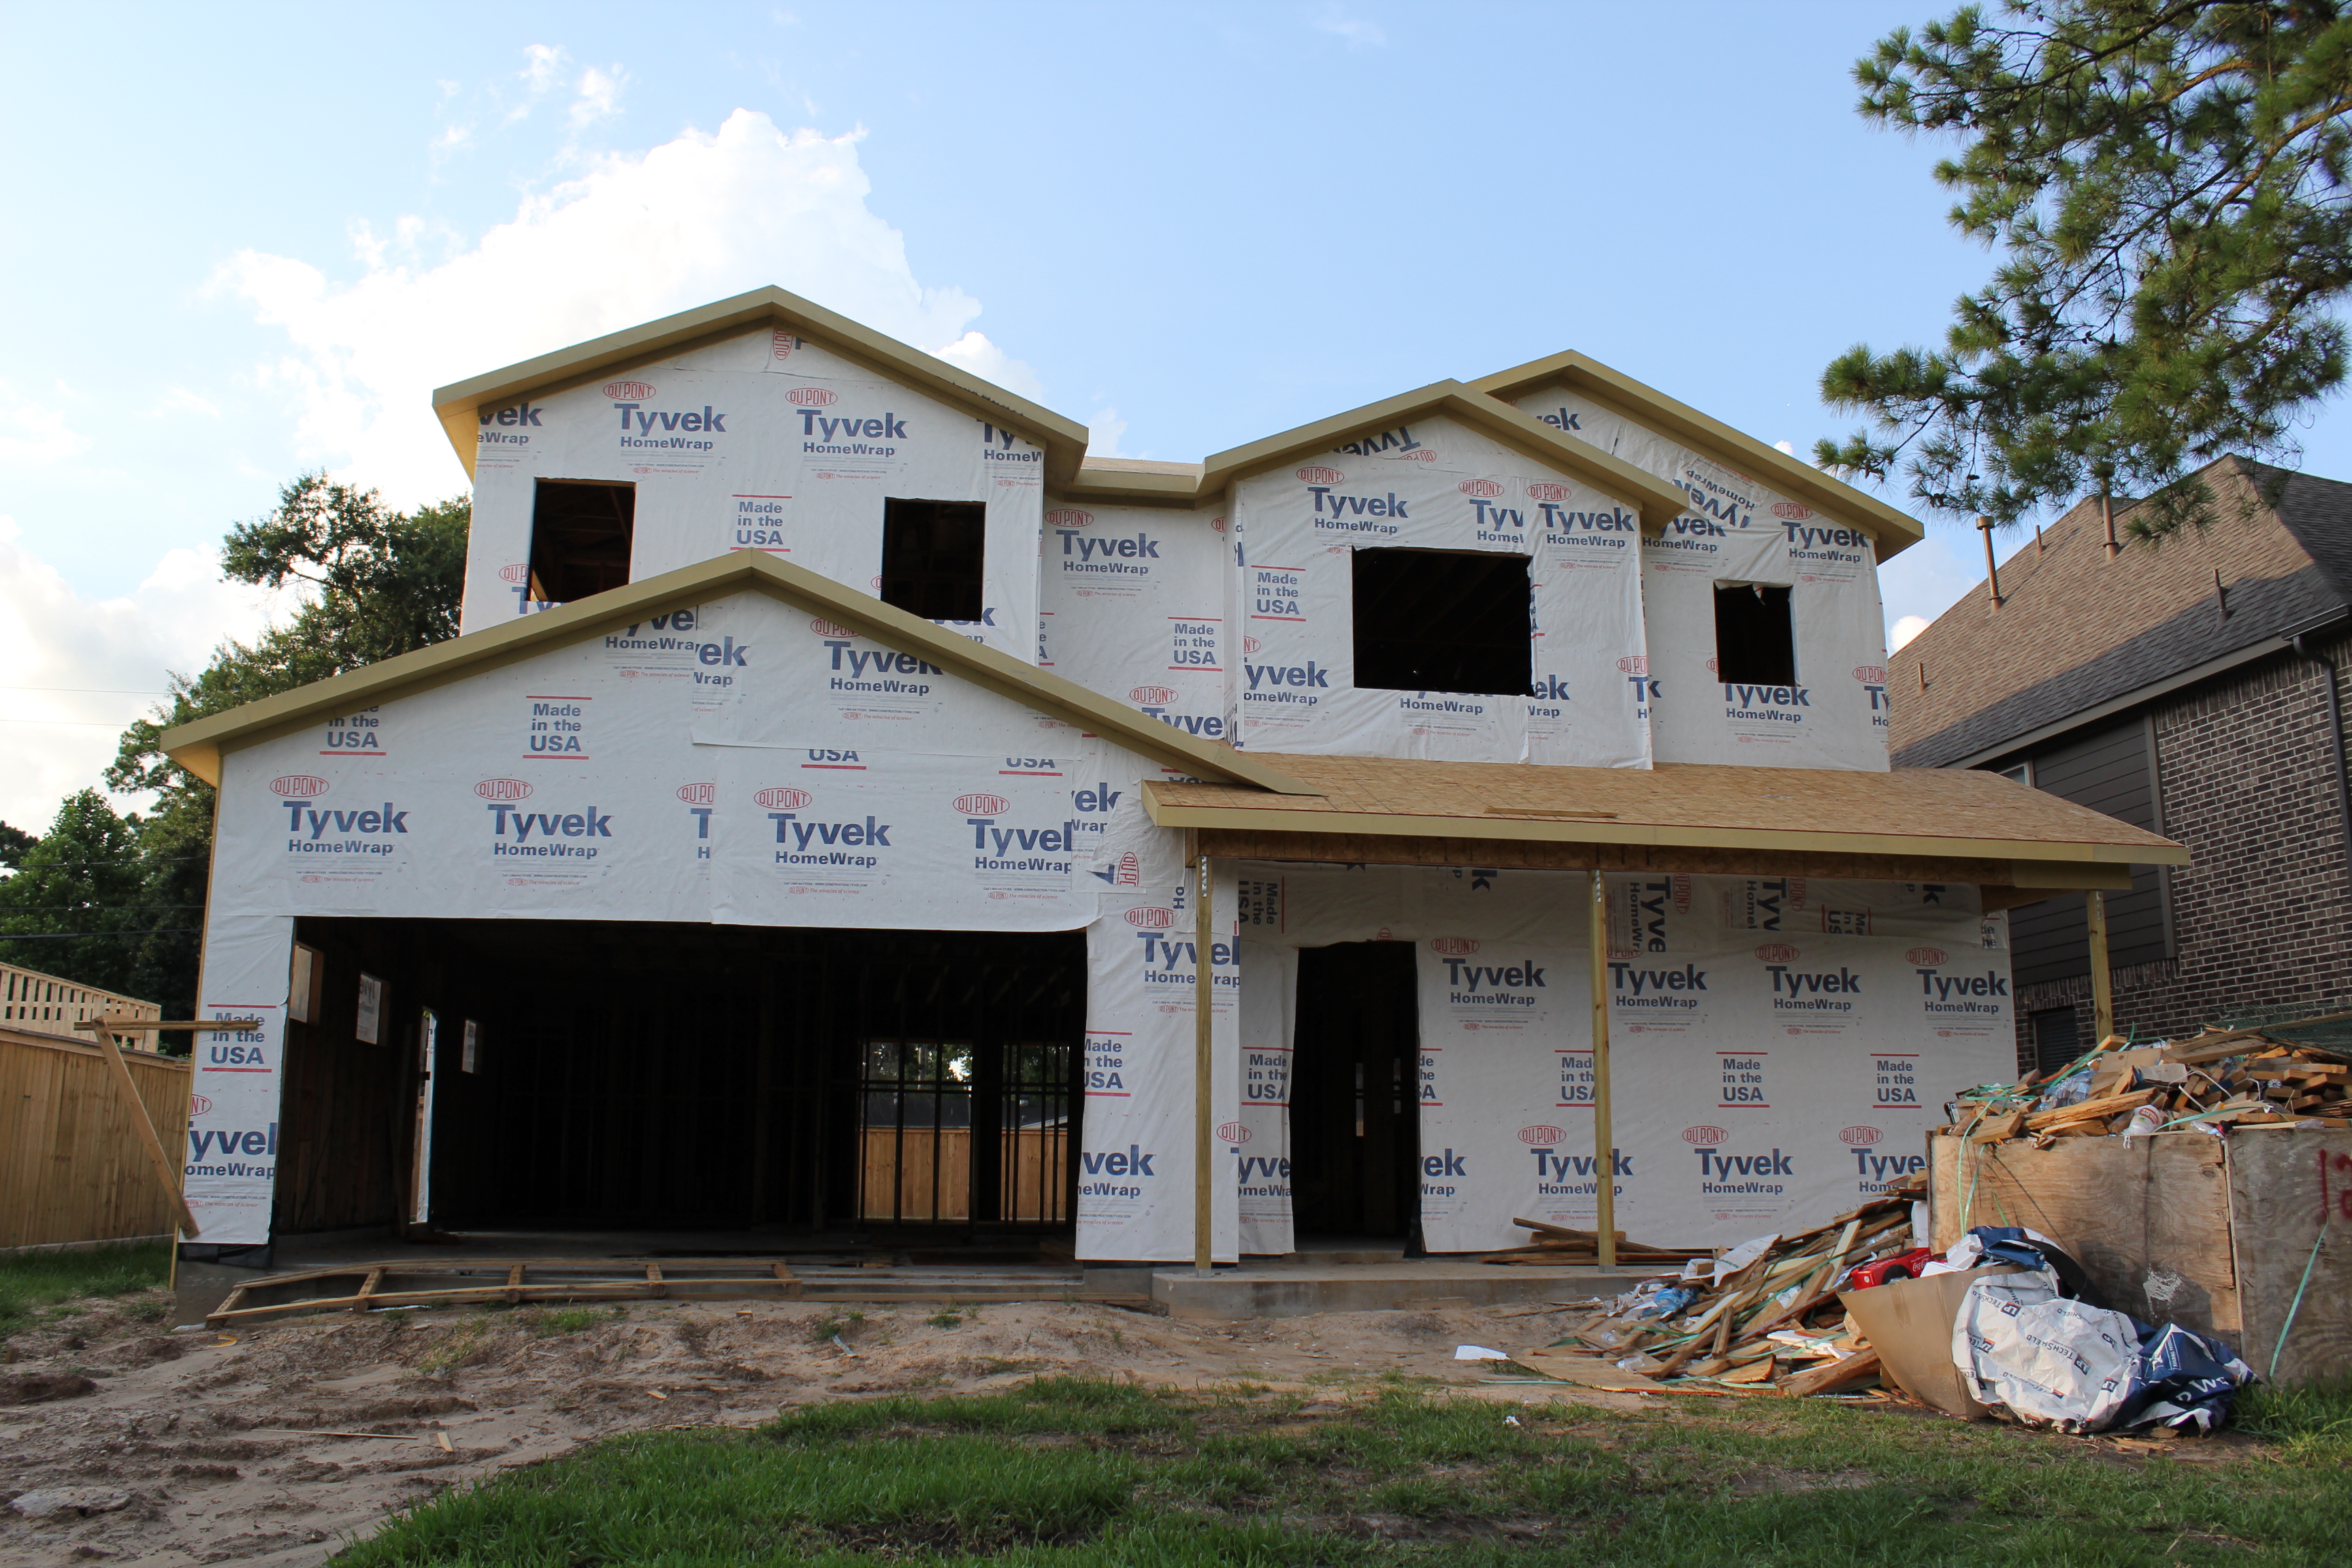
Hello 2017! Well, I thought I’d be in the #lucasfamilyhomeĀ  by now, but by early Dec. we were getting the sense it was not going to be until after the first of the year. It’s a moving target at this point, but I’m guessing mid-February now. It’s frustrating to say the least, but I’ll save that for another day. I wanted to share a quick update on tile progress. Much of this was installed a few week ago and if you follow me on Instagram, you may have seen someĀ  snapshots of tile here and there, particularly on Instastories, which has become my way to document Braden’s cuteness and mood swings. Follow meĀ  – reenlucas – on Instagram to see those shenanigans and other behind-the-scenes home adventures/frustrations.

Tile selection was something I was quite opinionated about, much to my hubby’s dismay. My goal was to pick classic finishes so I could have a clean slate to choose paint colors or include other personal touches to make the room feel like my own. And, of courseĀ  – we were always trying to keep budget in mind. My husband was so kind to constantly give me that reality check every step of the way.

I’ll be playing some catch-up with my next few home posts, so stay tuned for more on the home front soon!

kids-tile-bath-with-b

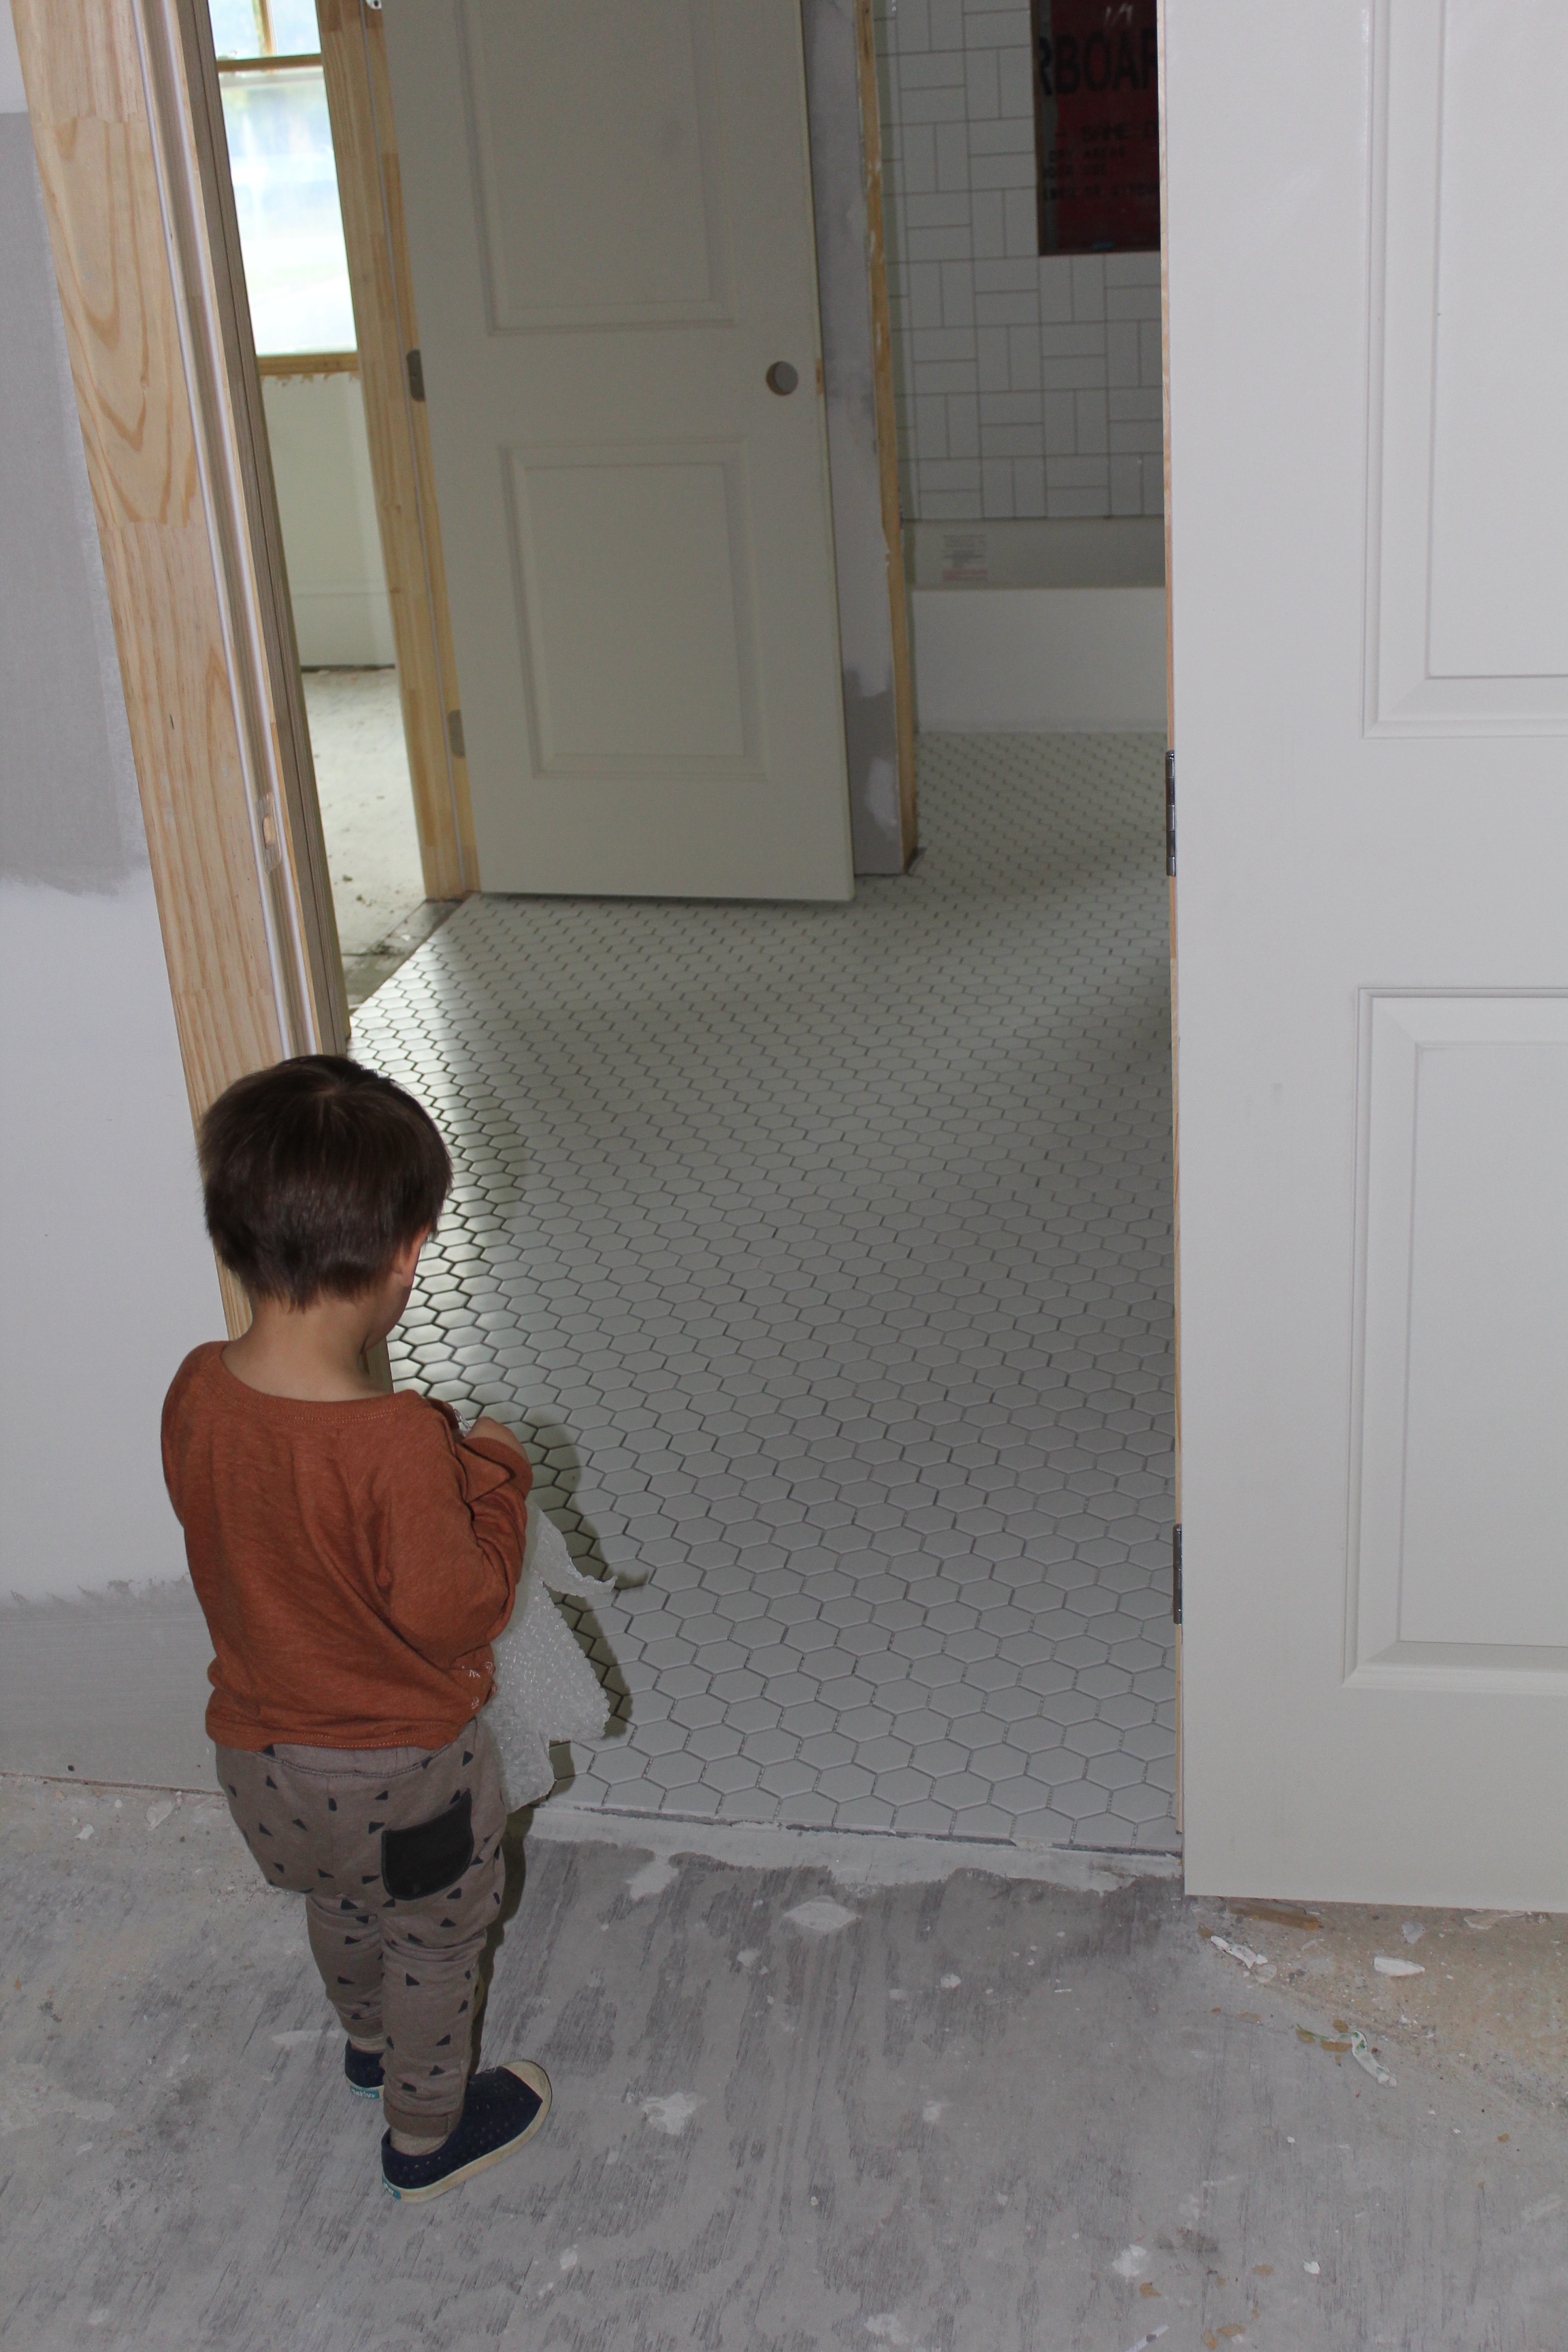
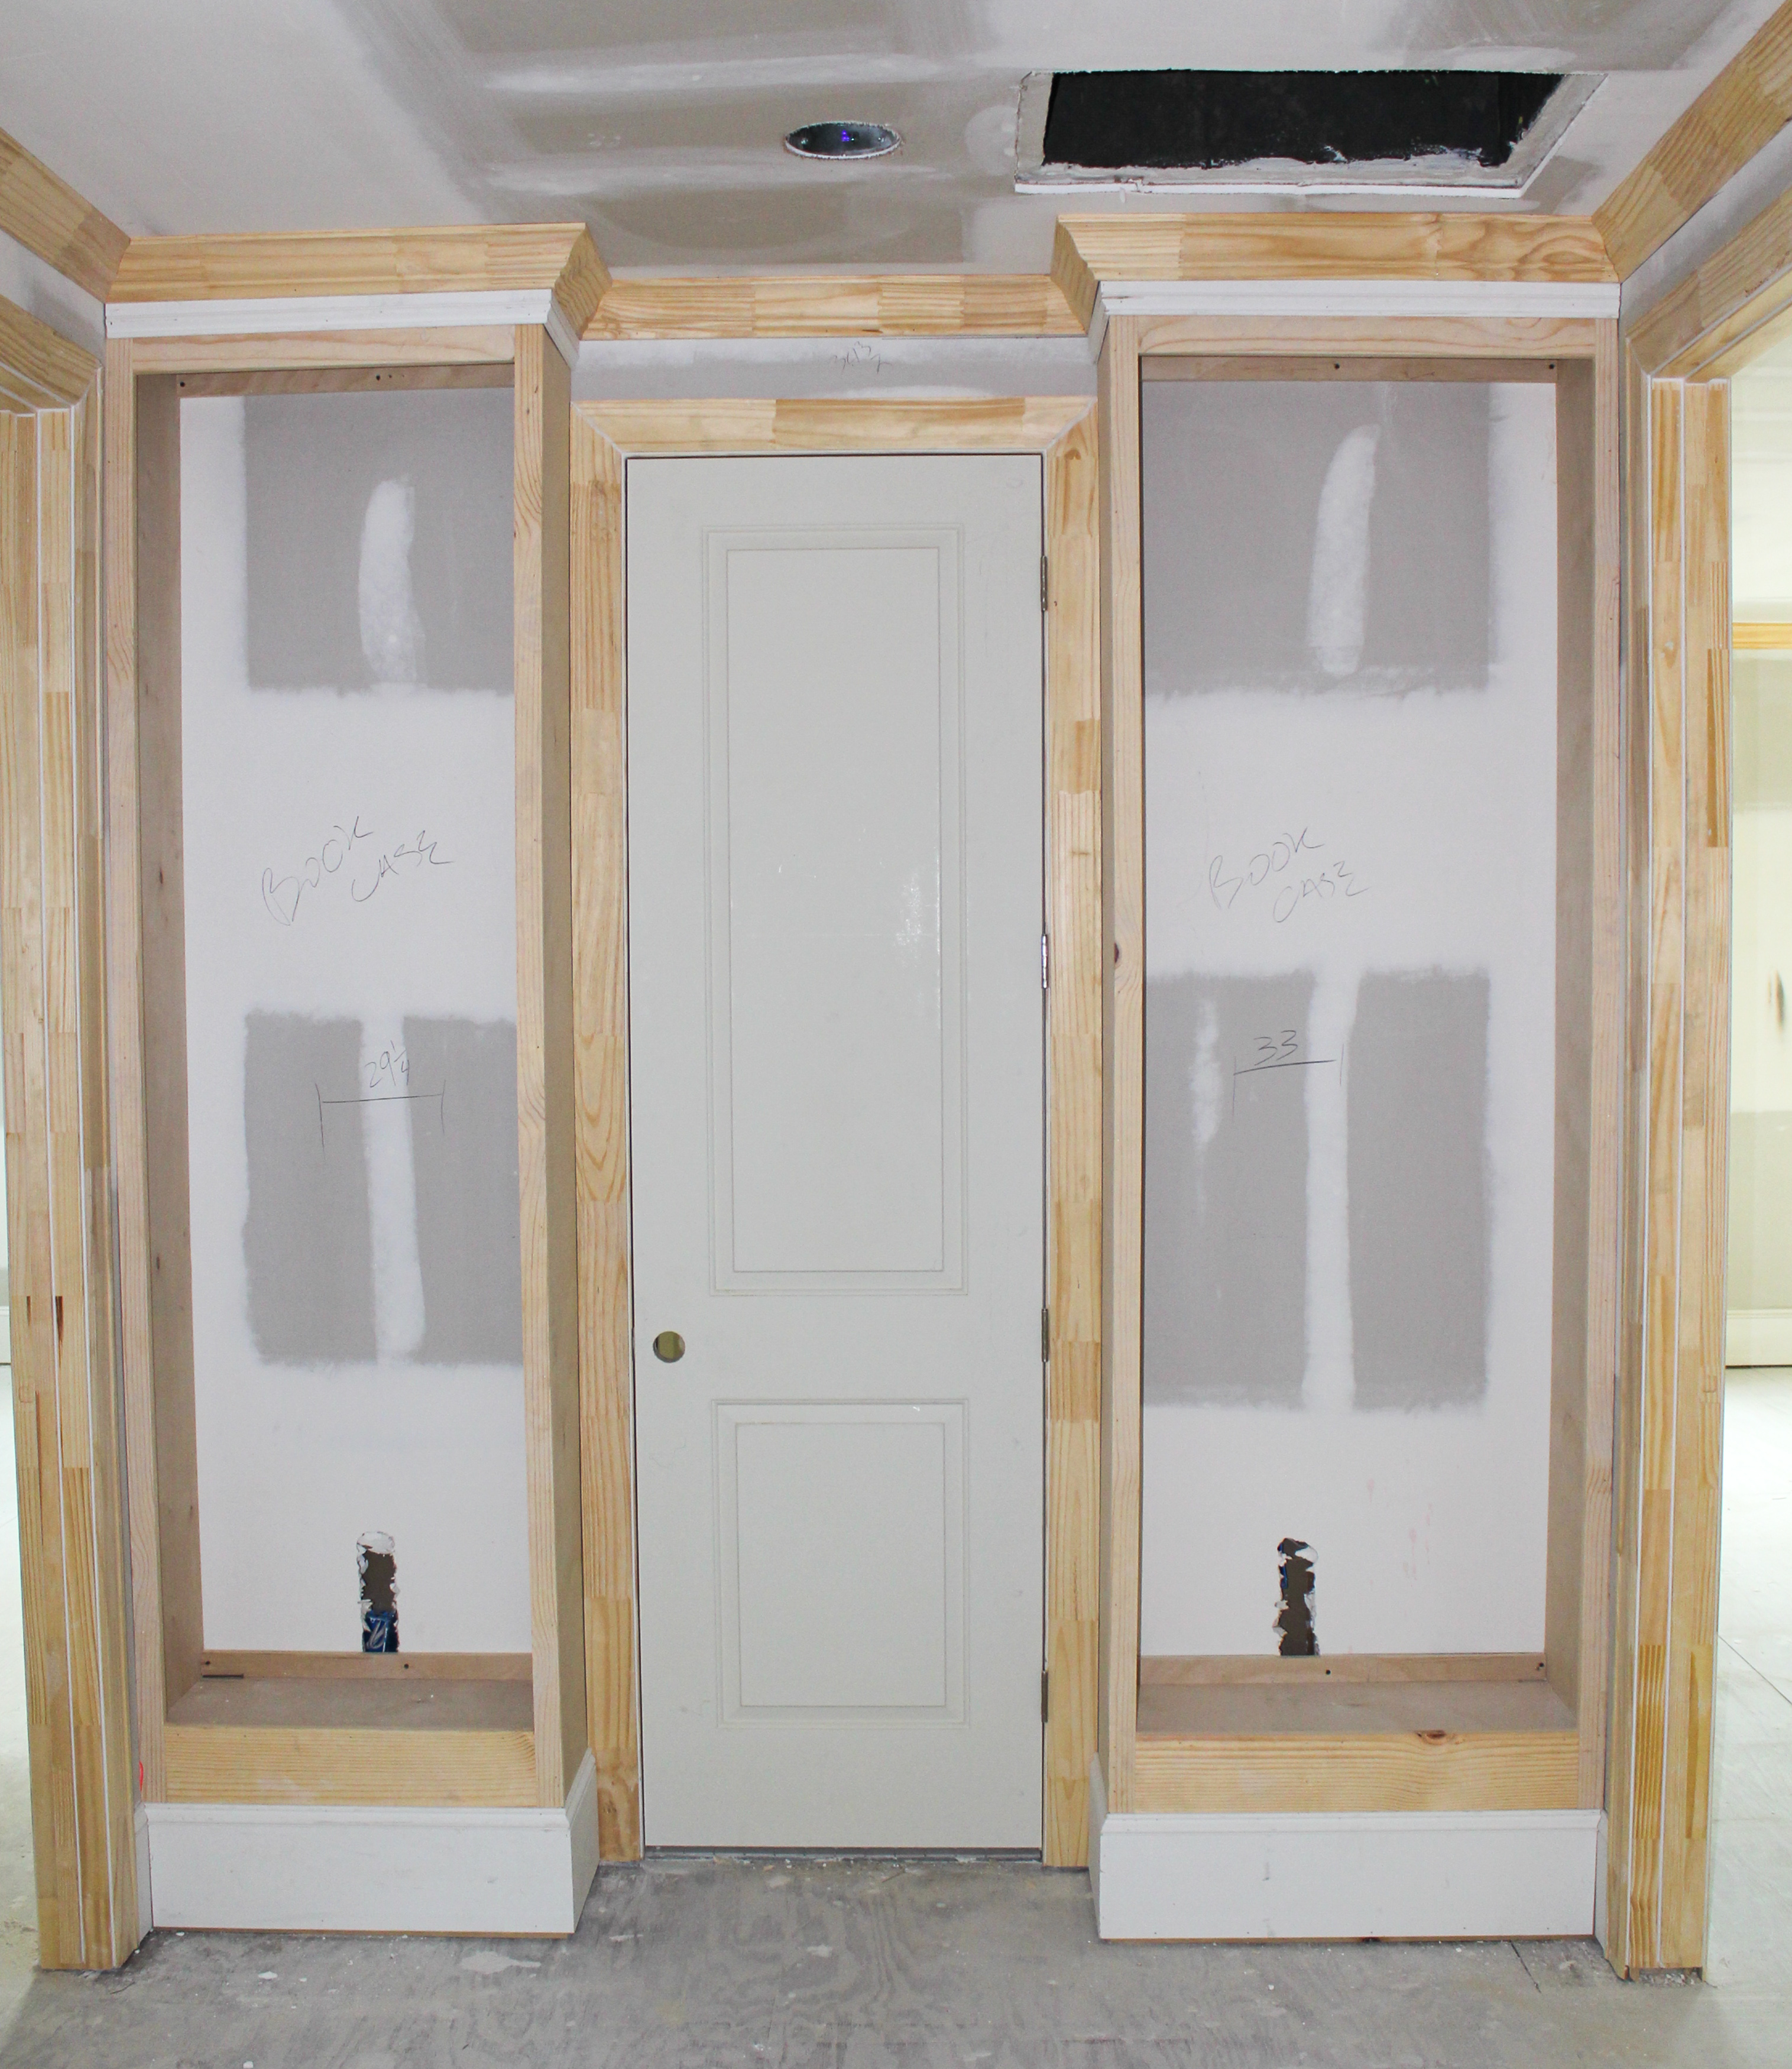
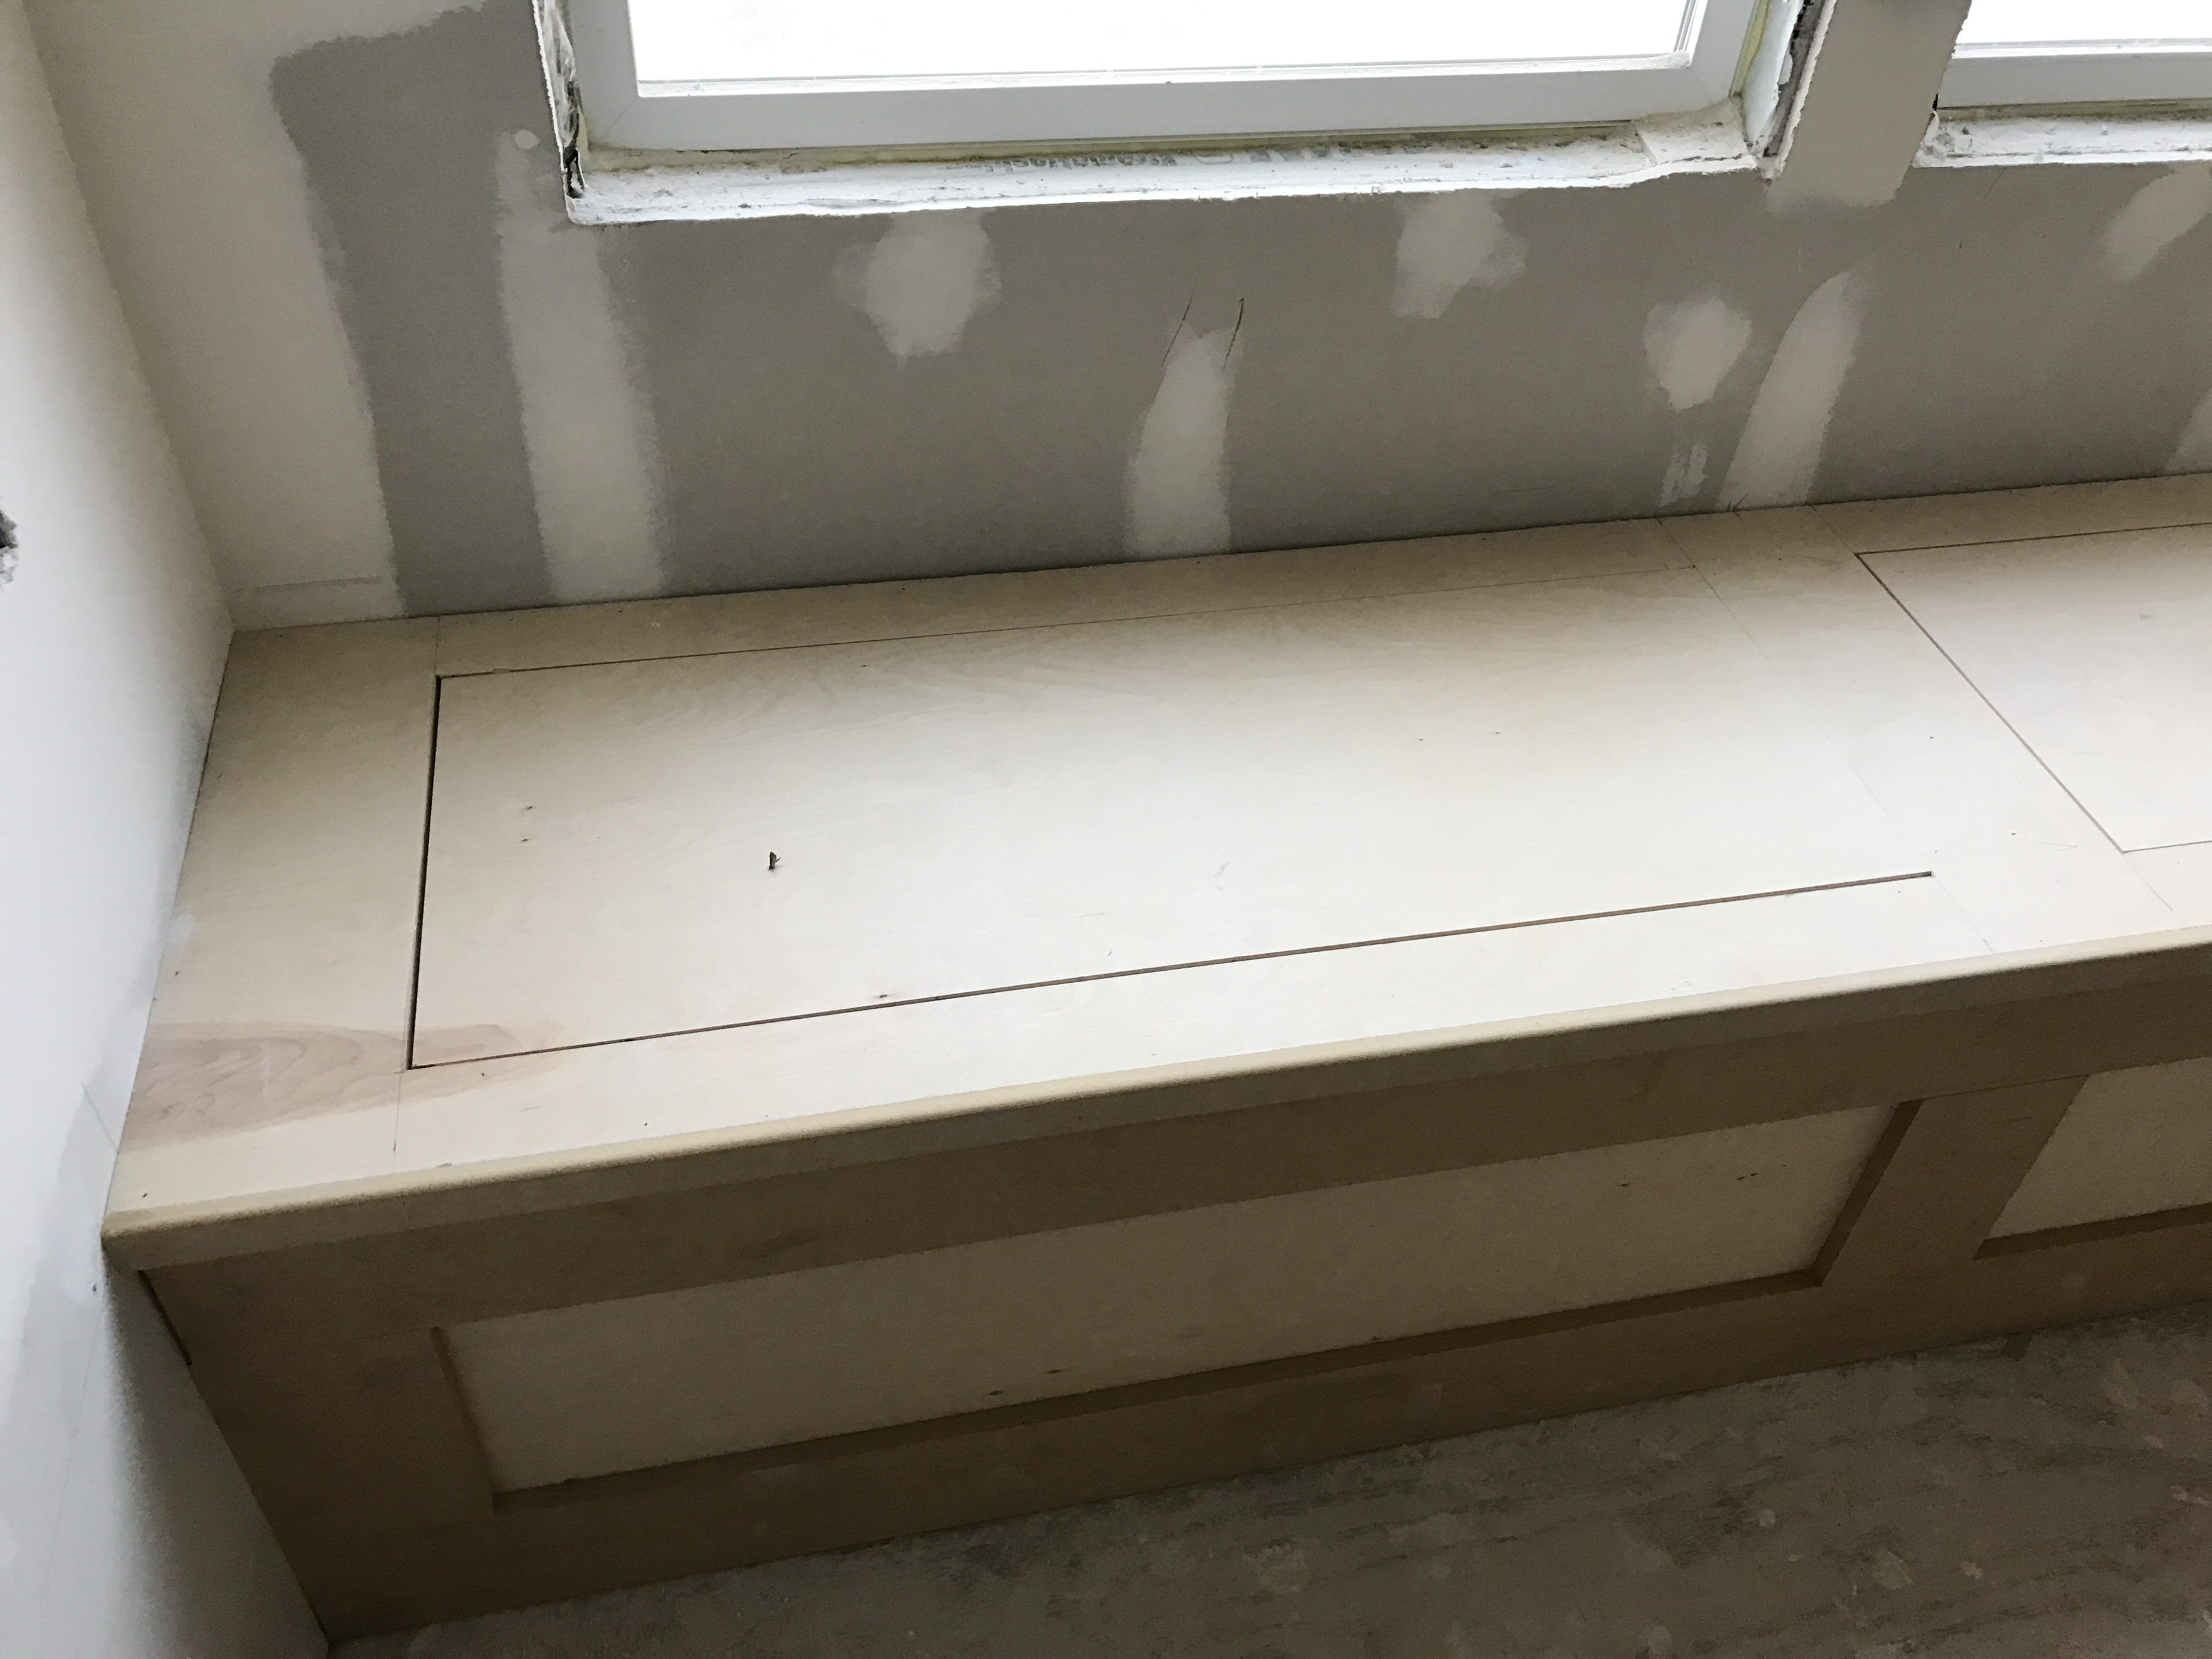
Braden stepping into his bathroom. This bathroom has two shelves flanking it from the game room entry way making it accessible for people lounging upstairs.
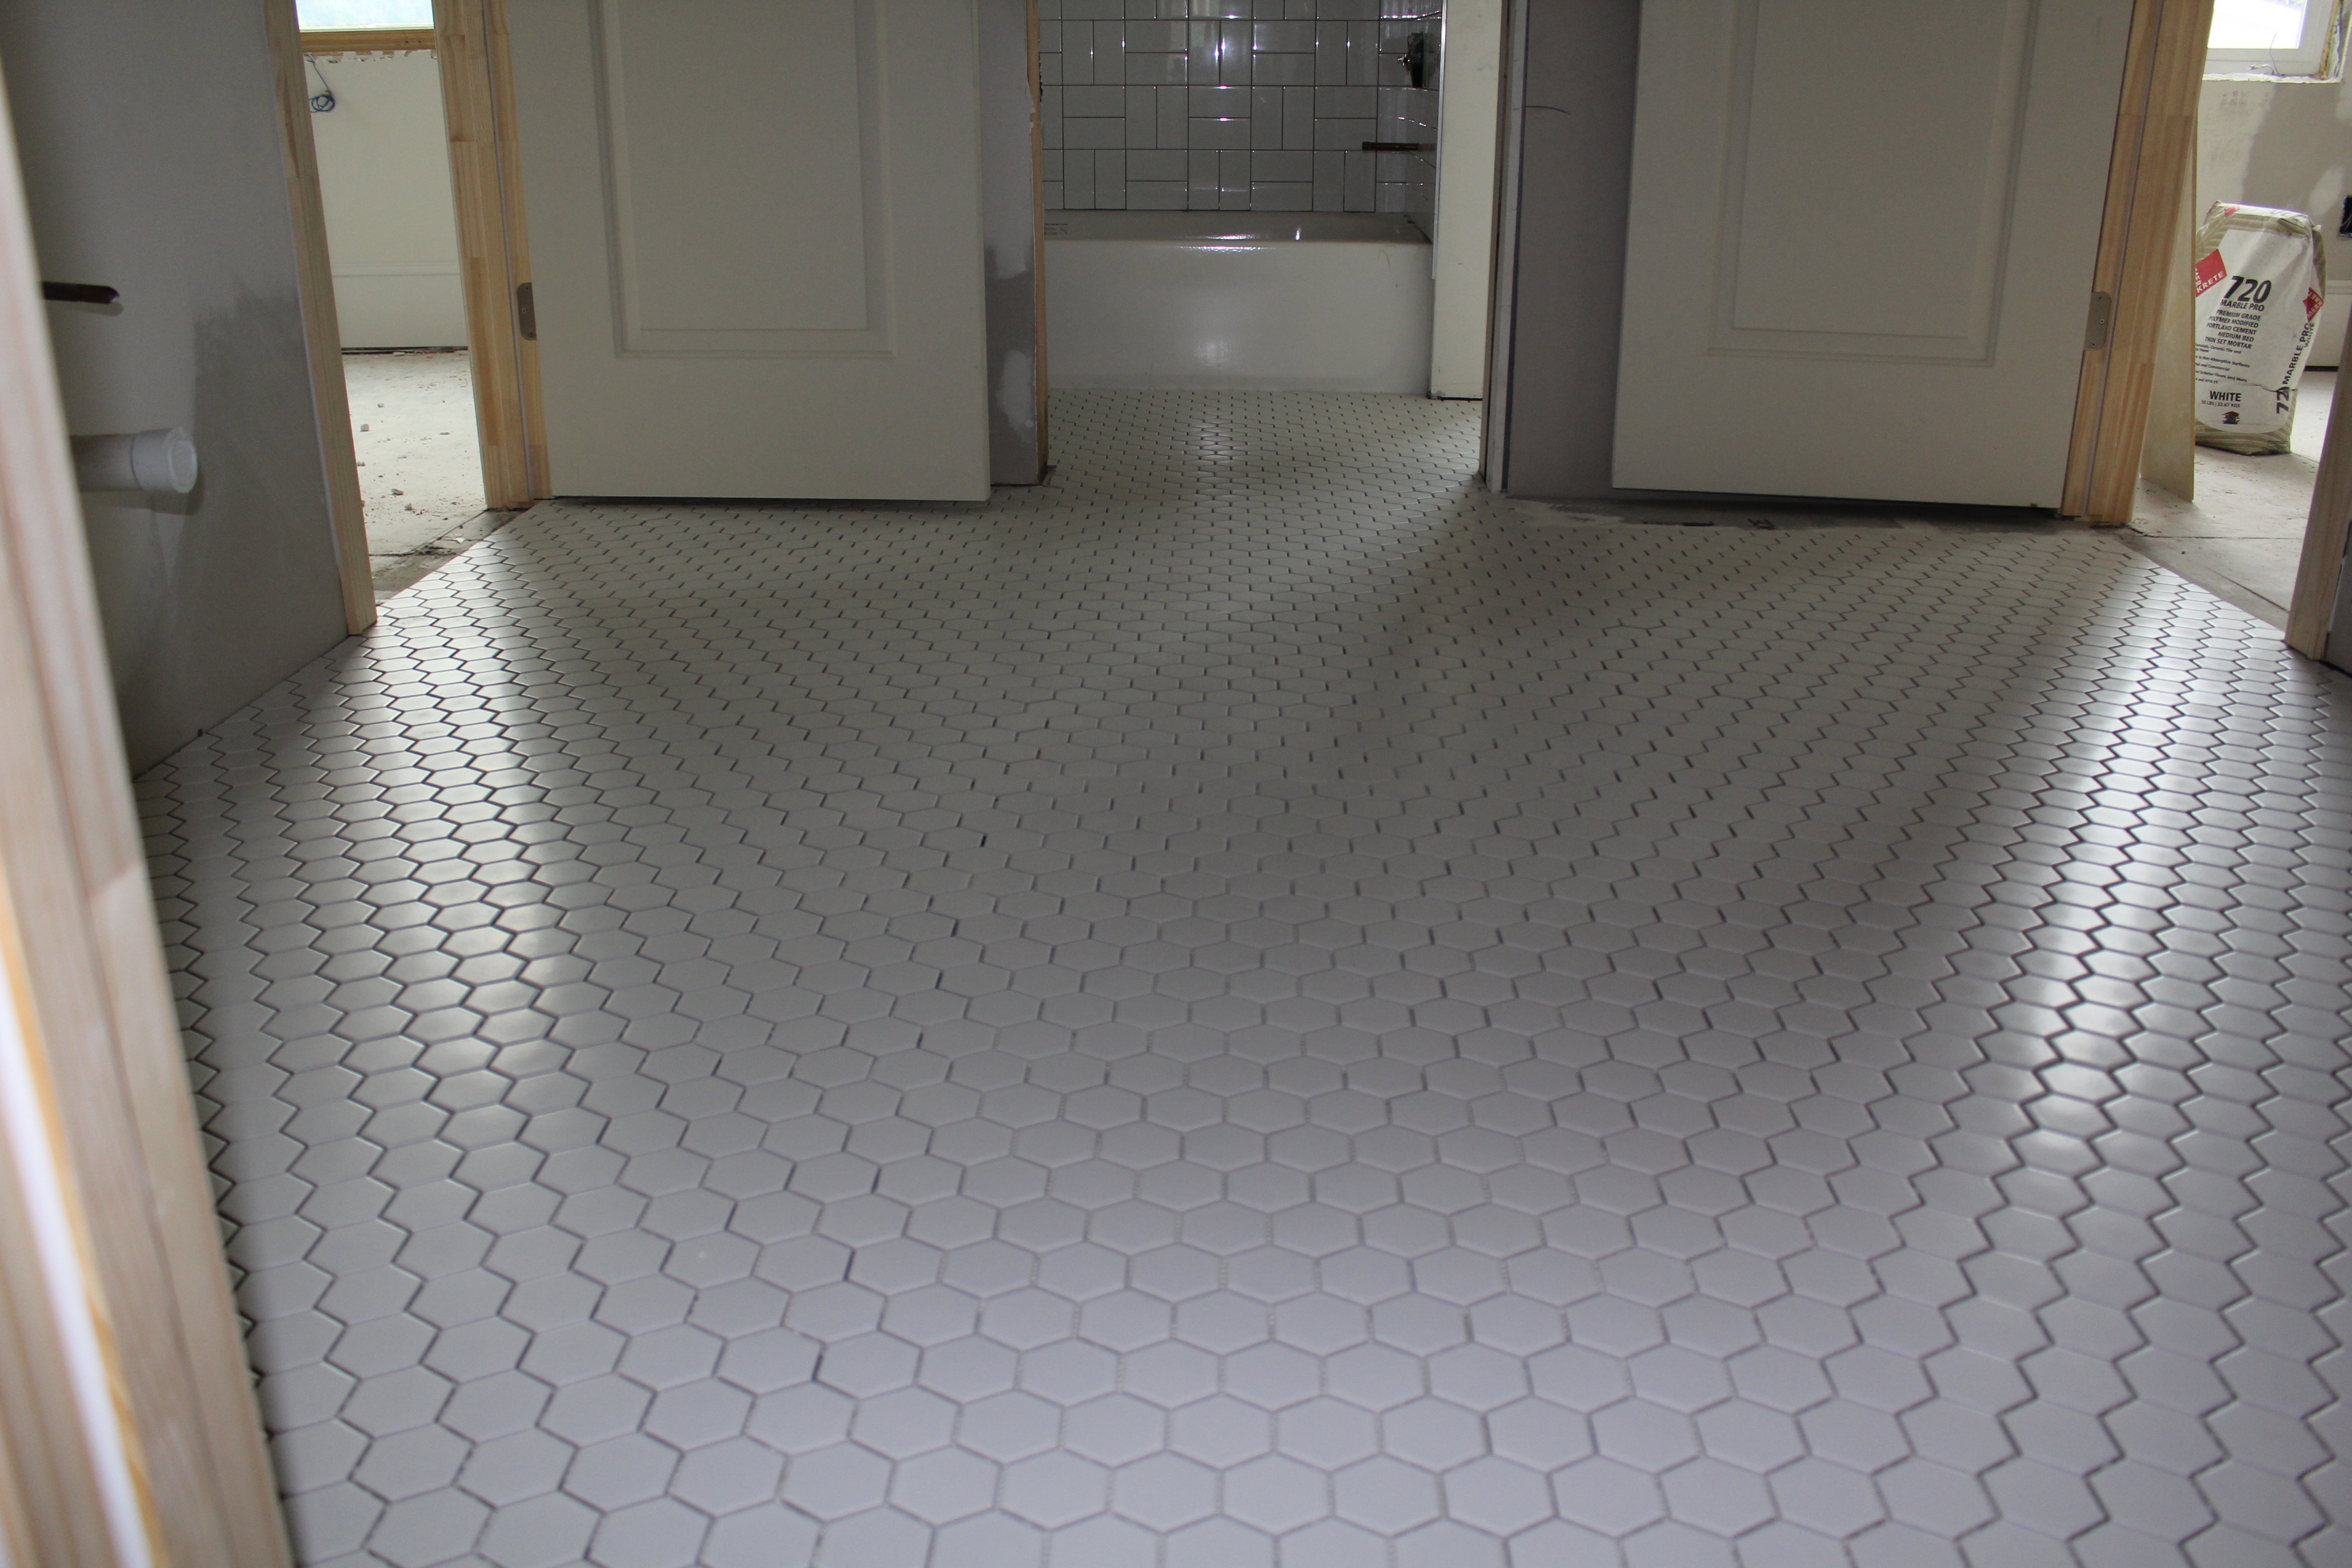
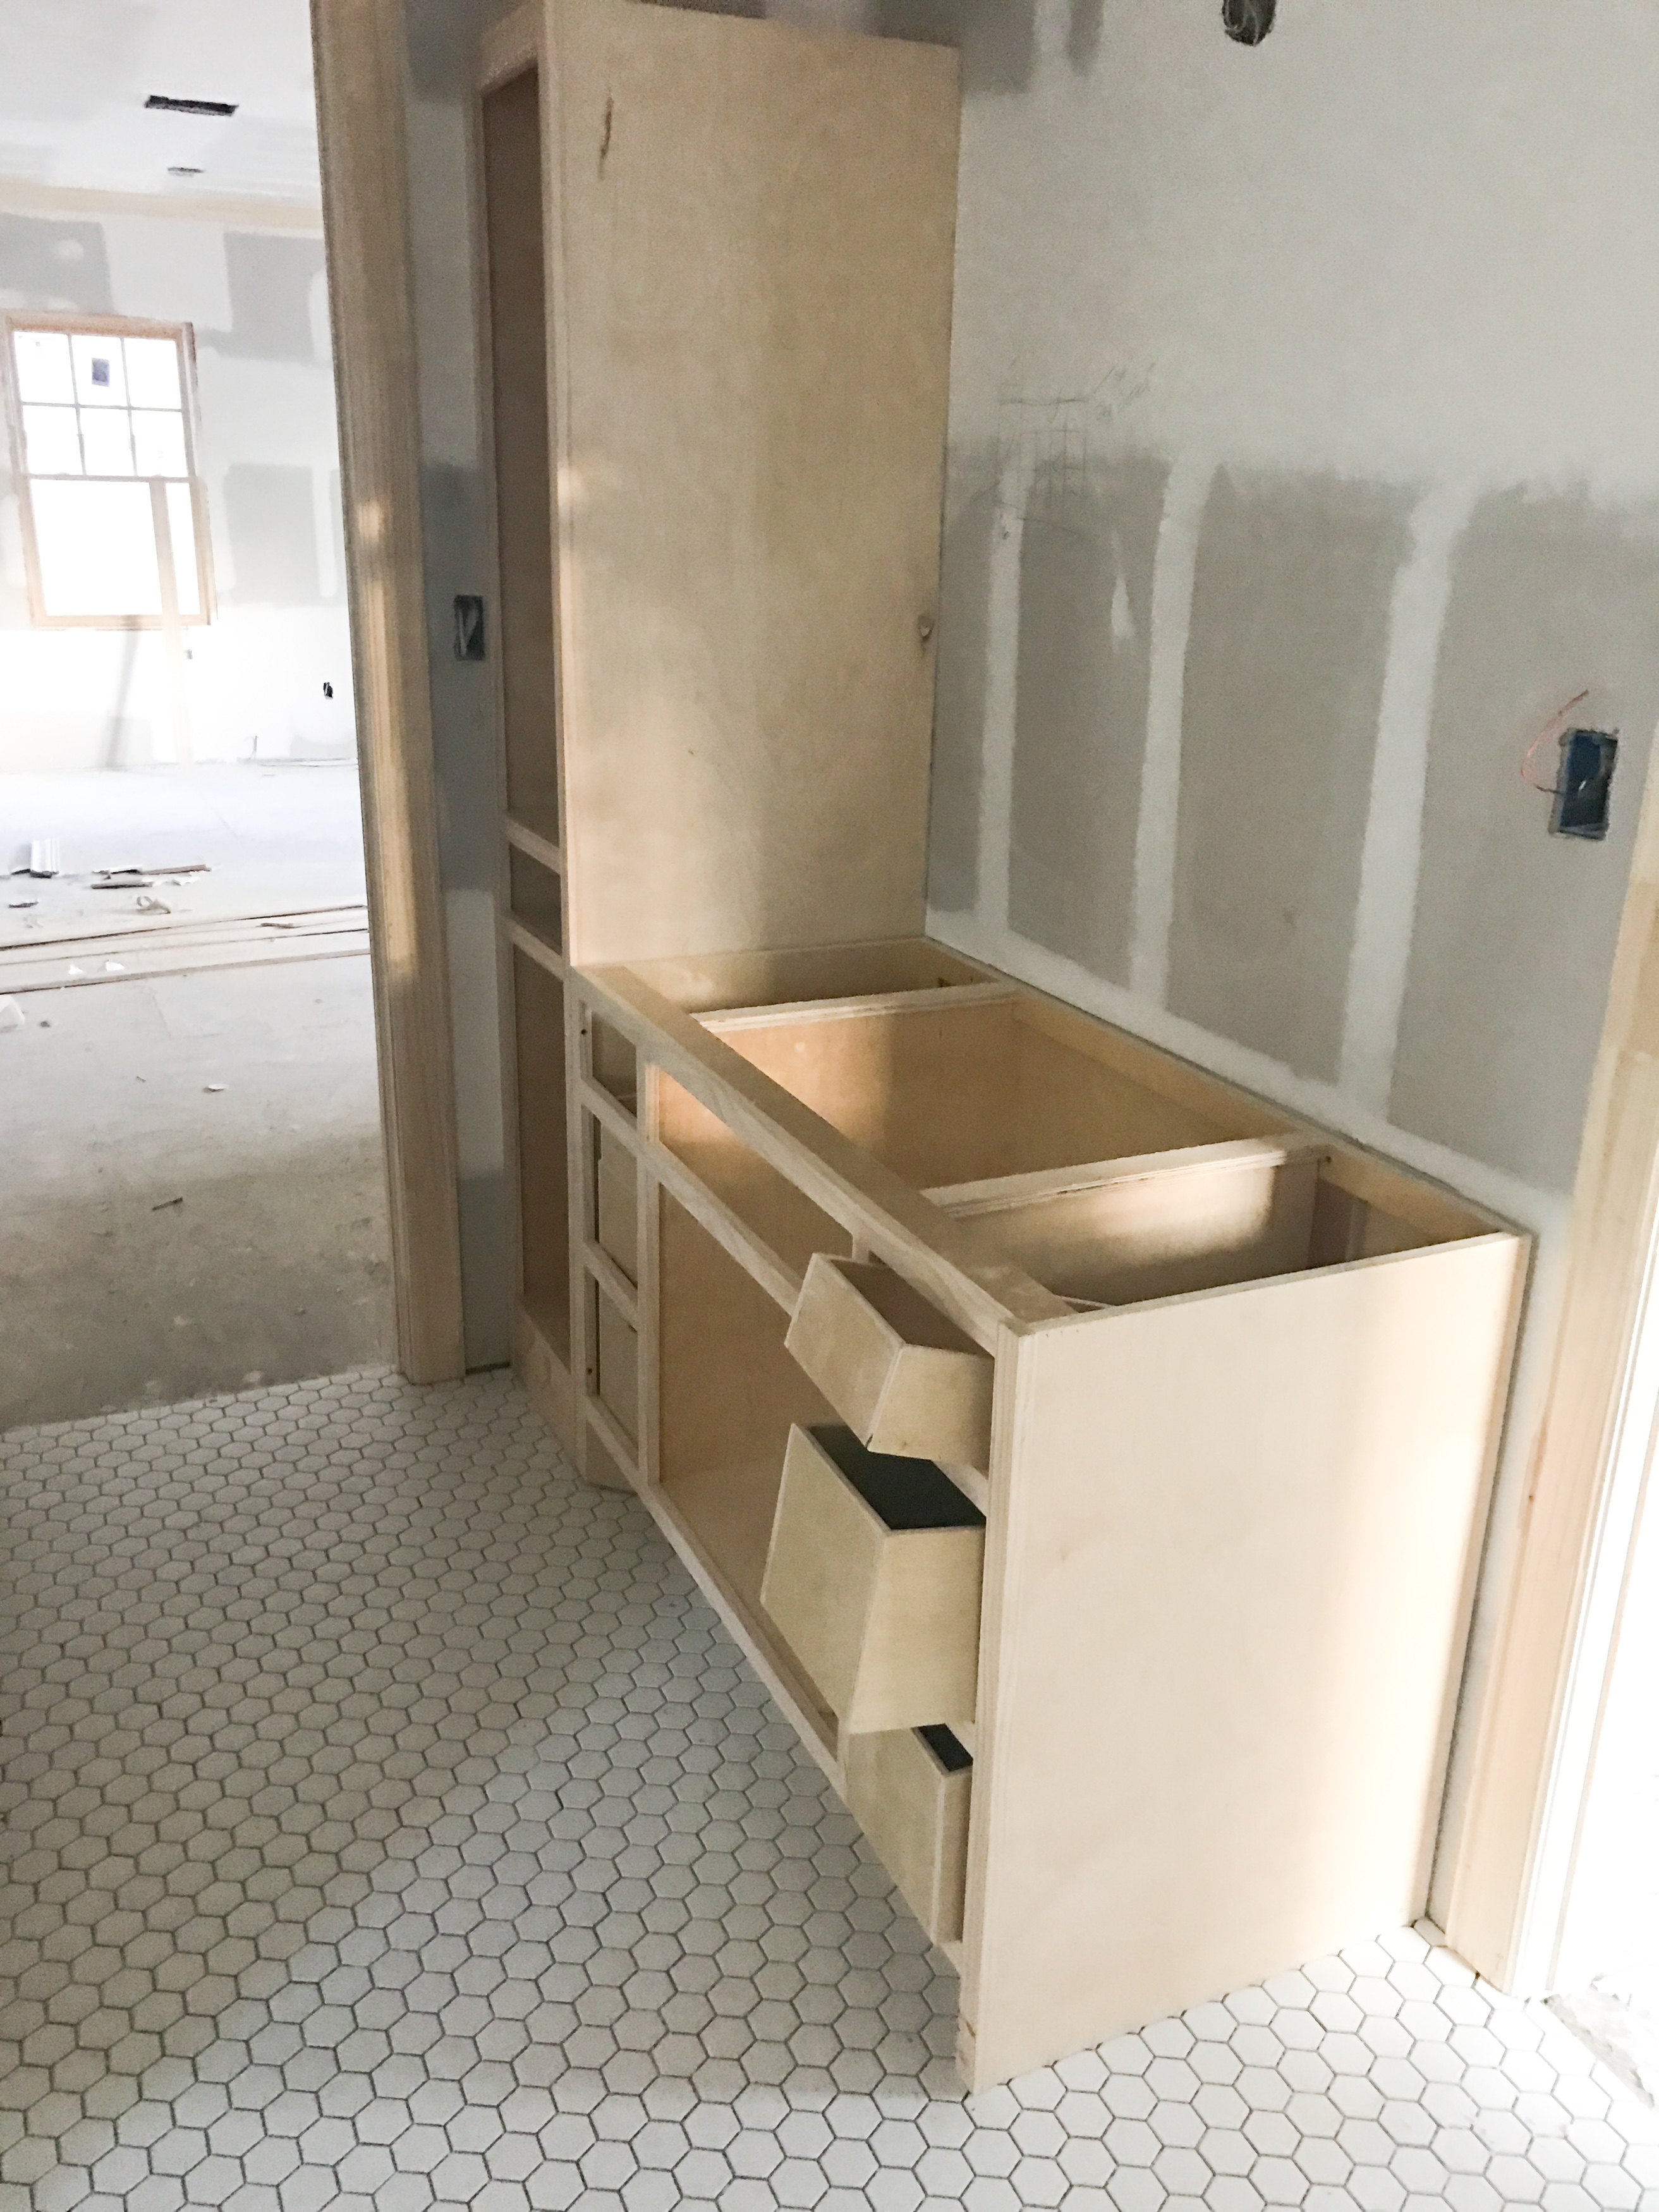
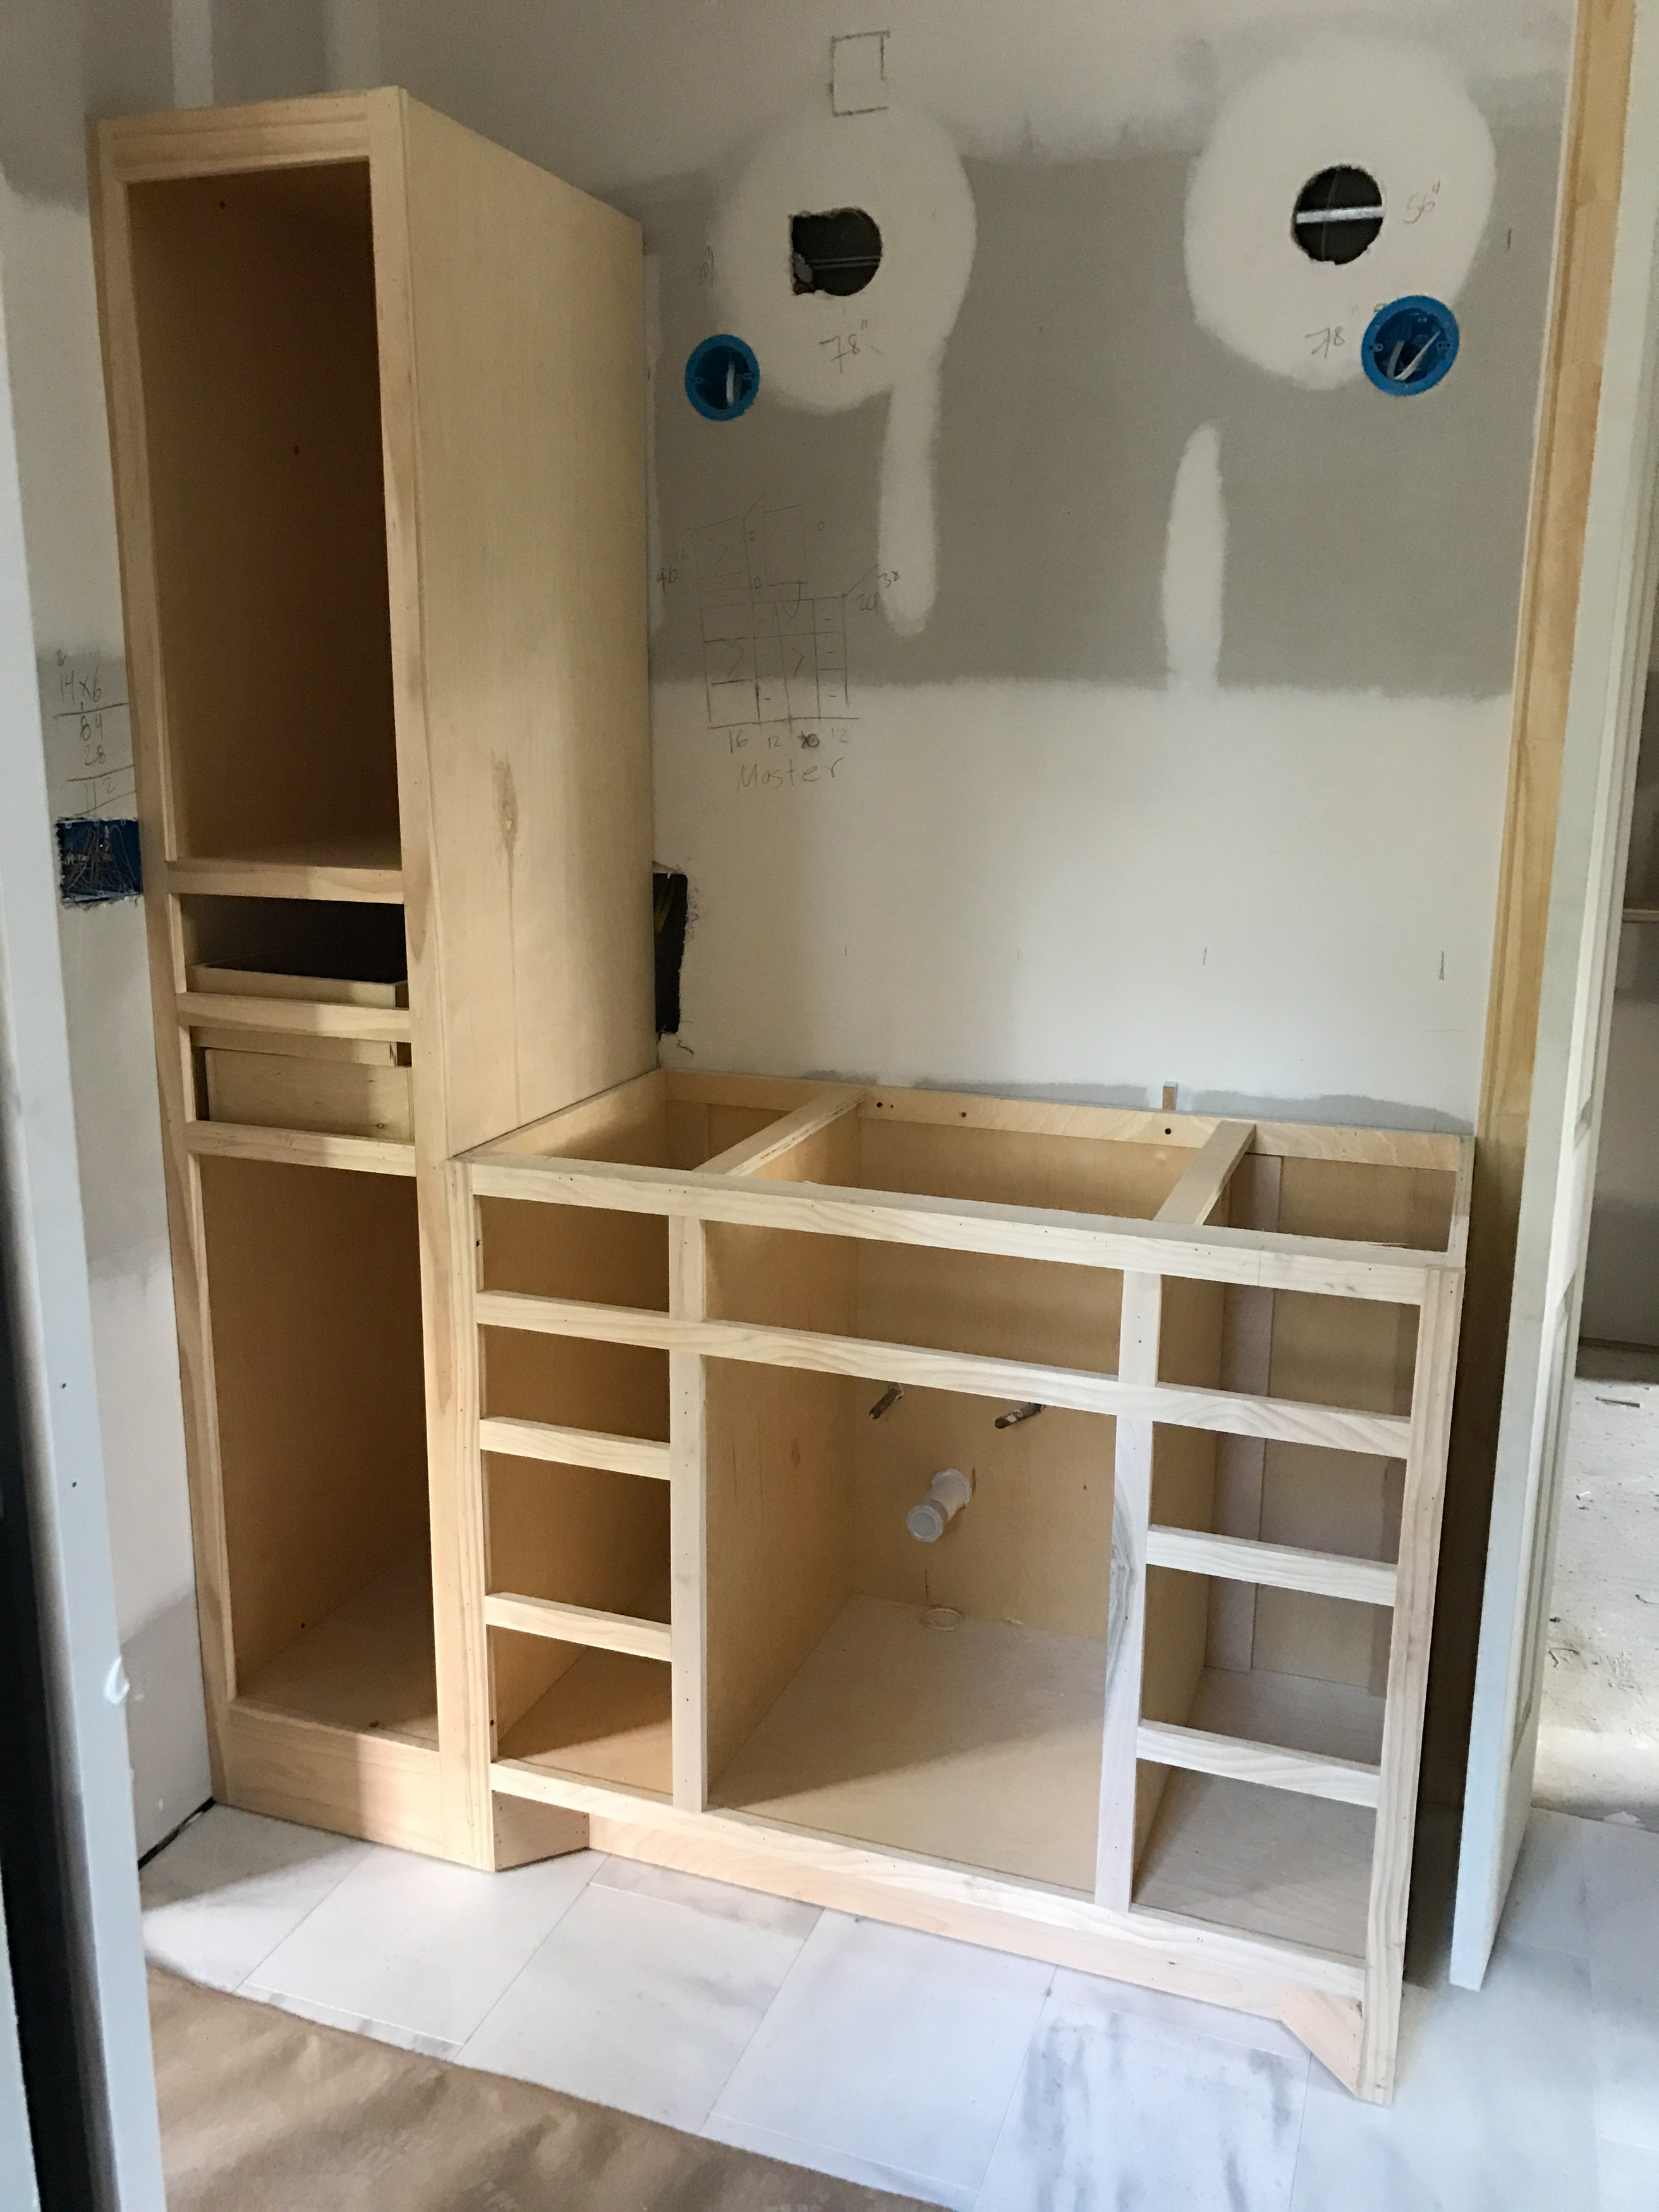
kids-bath-tile-hex

For this jack and jill style bathroom,Ā  we wantedĀ  durable, classic materials. TheĀ  cabinets will get some color to give the room some personality. We chose ceramic tile in a classic white 2 inch hex. The shower is a white ceramic 3×6 subway tile in a crosshatch pattern. Ben was skeptical about this at first, but liked it afterwards. Pretty much the story of my life. šŸ™‚

herringbone-laundry-in-progress

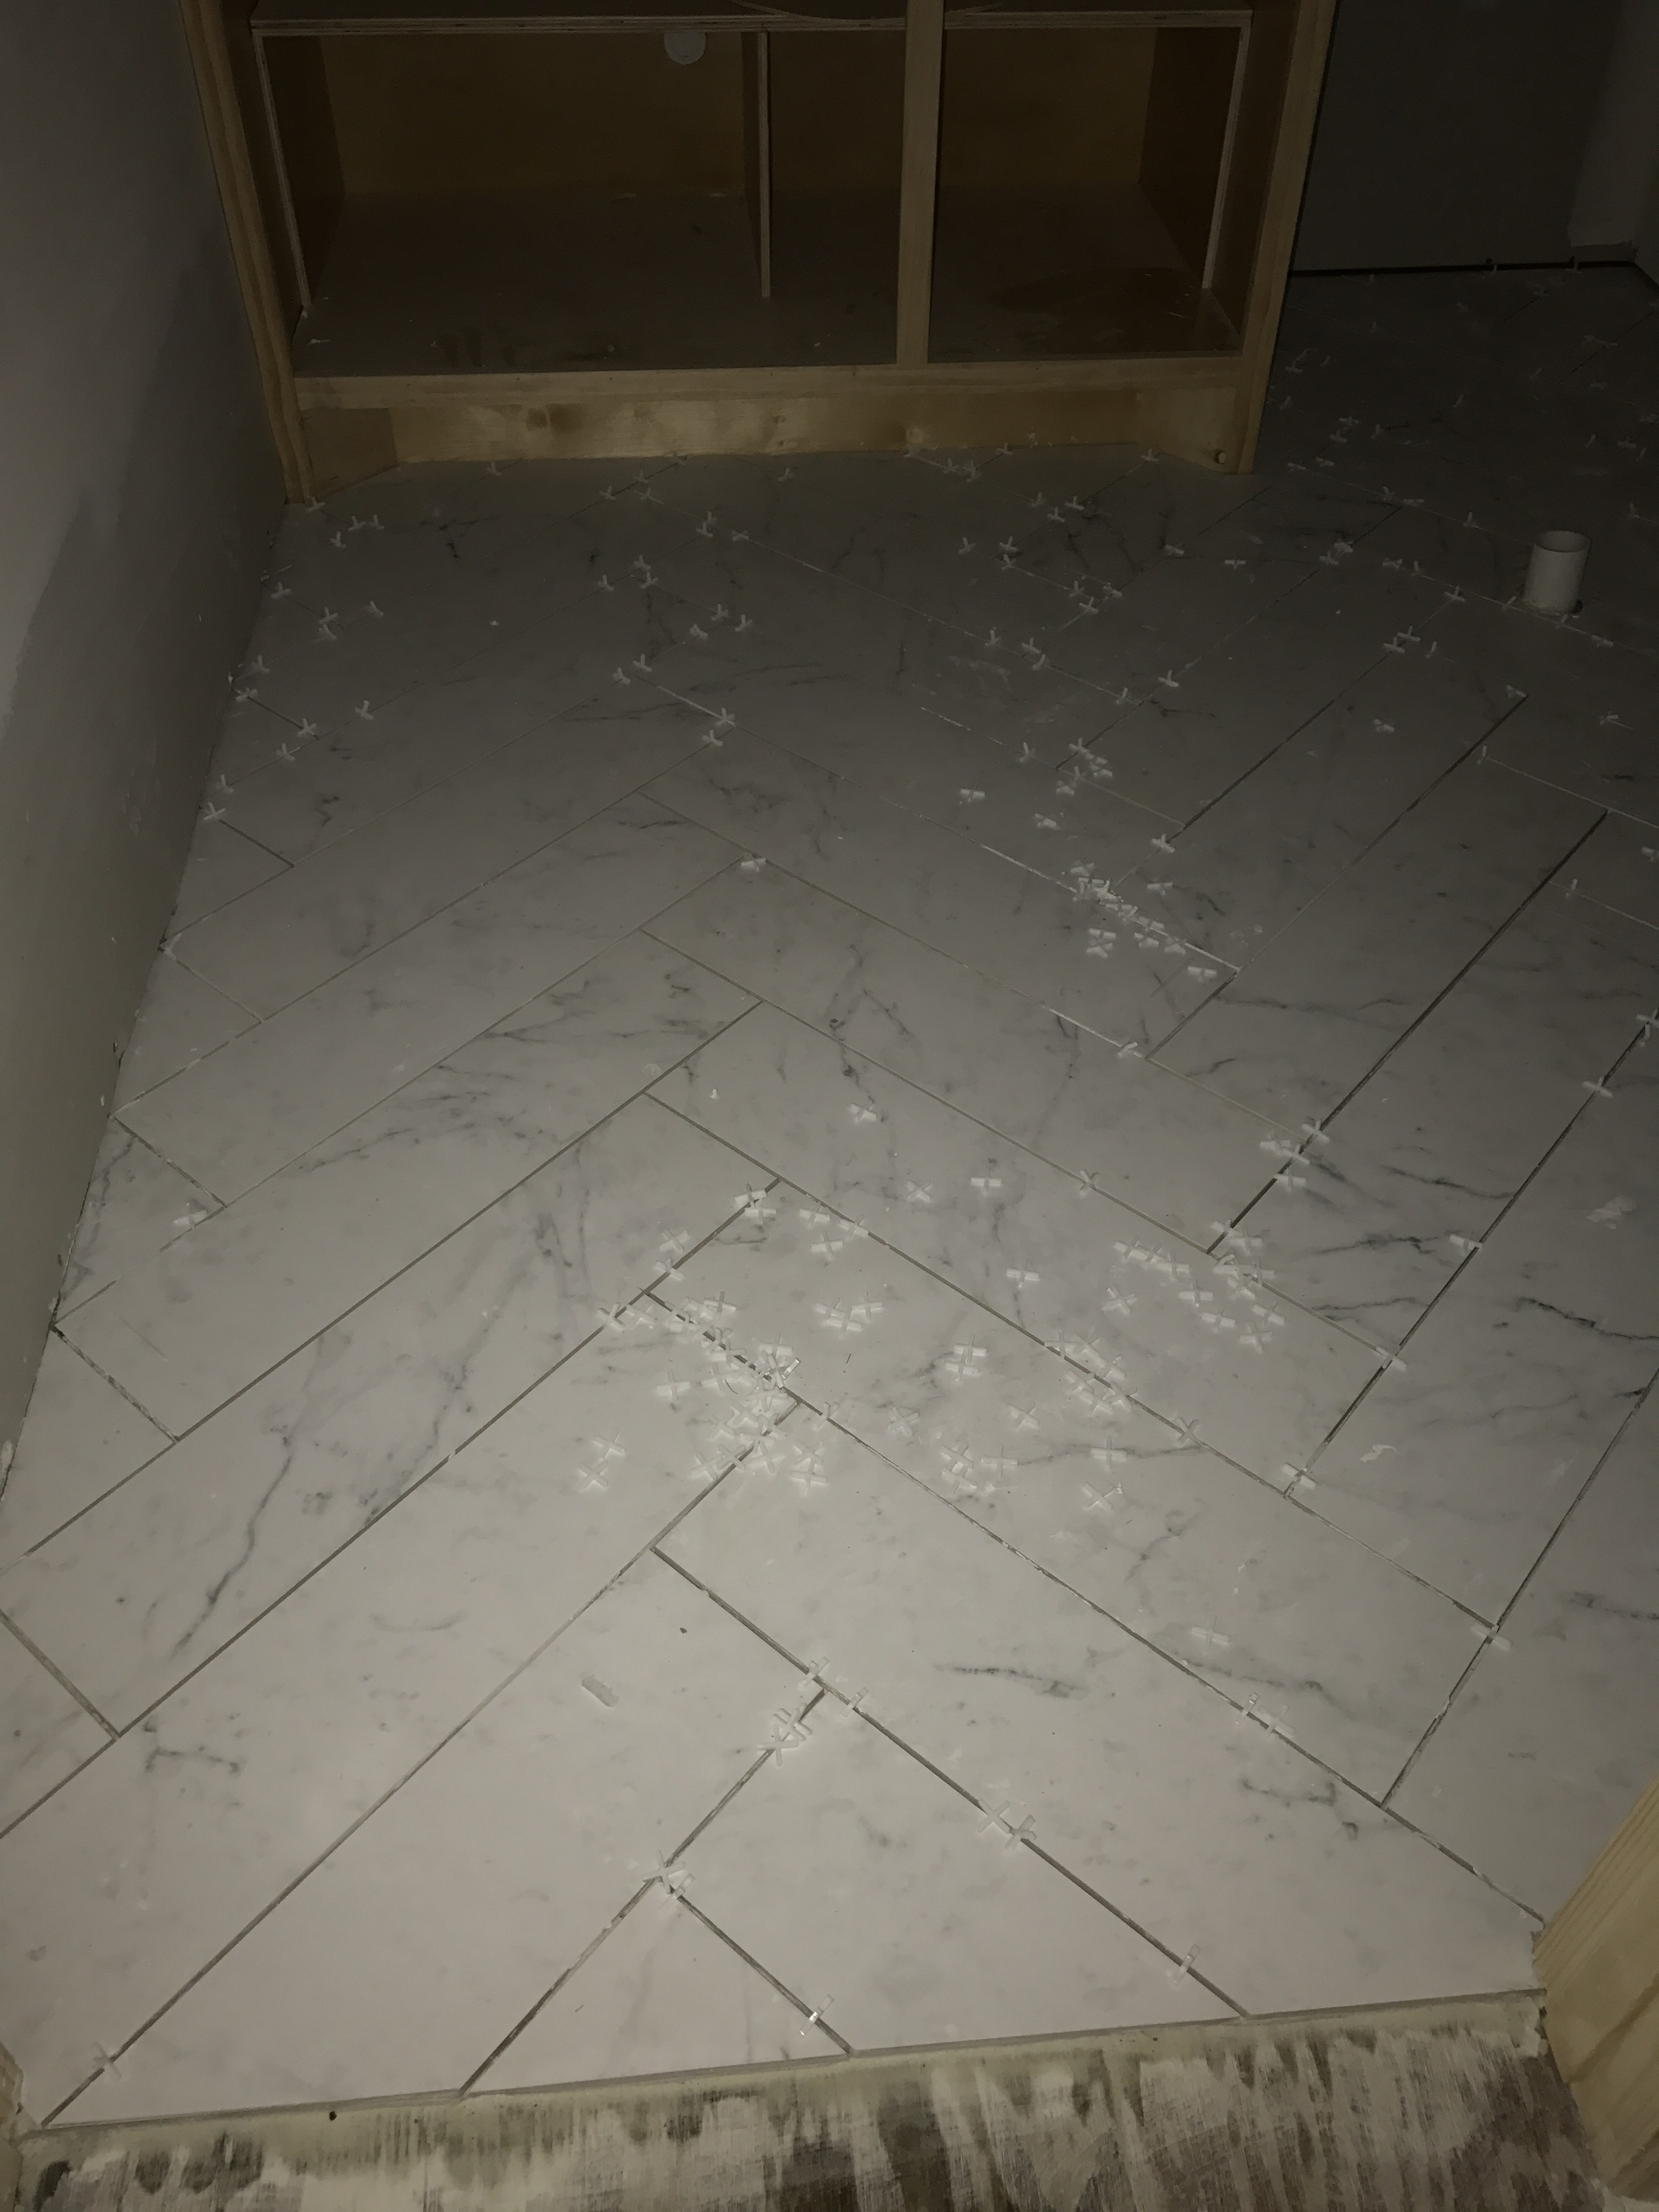
My original vision for the mudroom was to do a ceramic tile in a fun pattern, but sourcing that was difficult with the timing we were up against and not budget friendly. With it being a relatively small space, it just seemed silly to spend that much on tile that was going to be covered in dirty laundry. So, we went with 12×24 ceramic tile cut to 6×24 and laid that in a herringbone pattern.

downstairs-guest-bath-3-inch-marble-hex

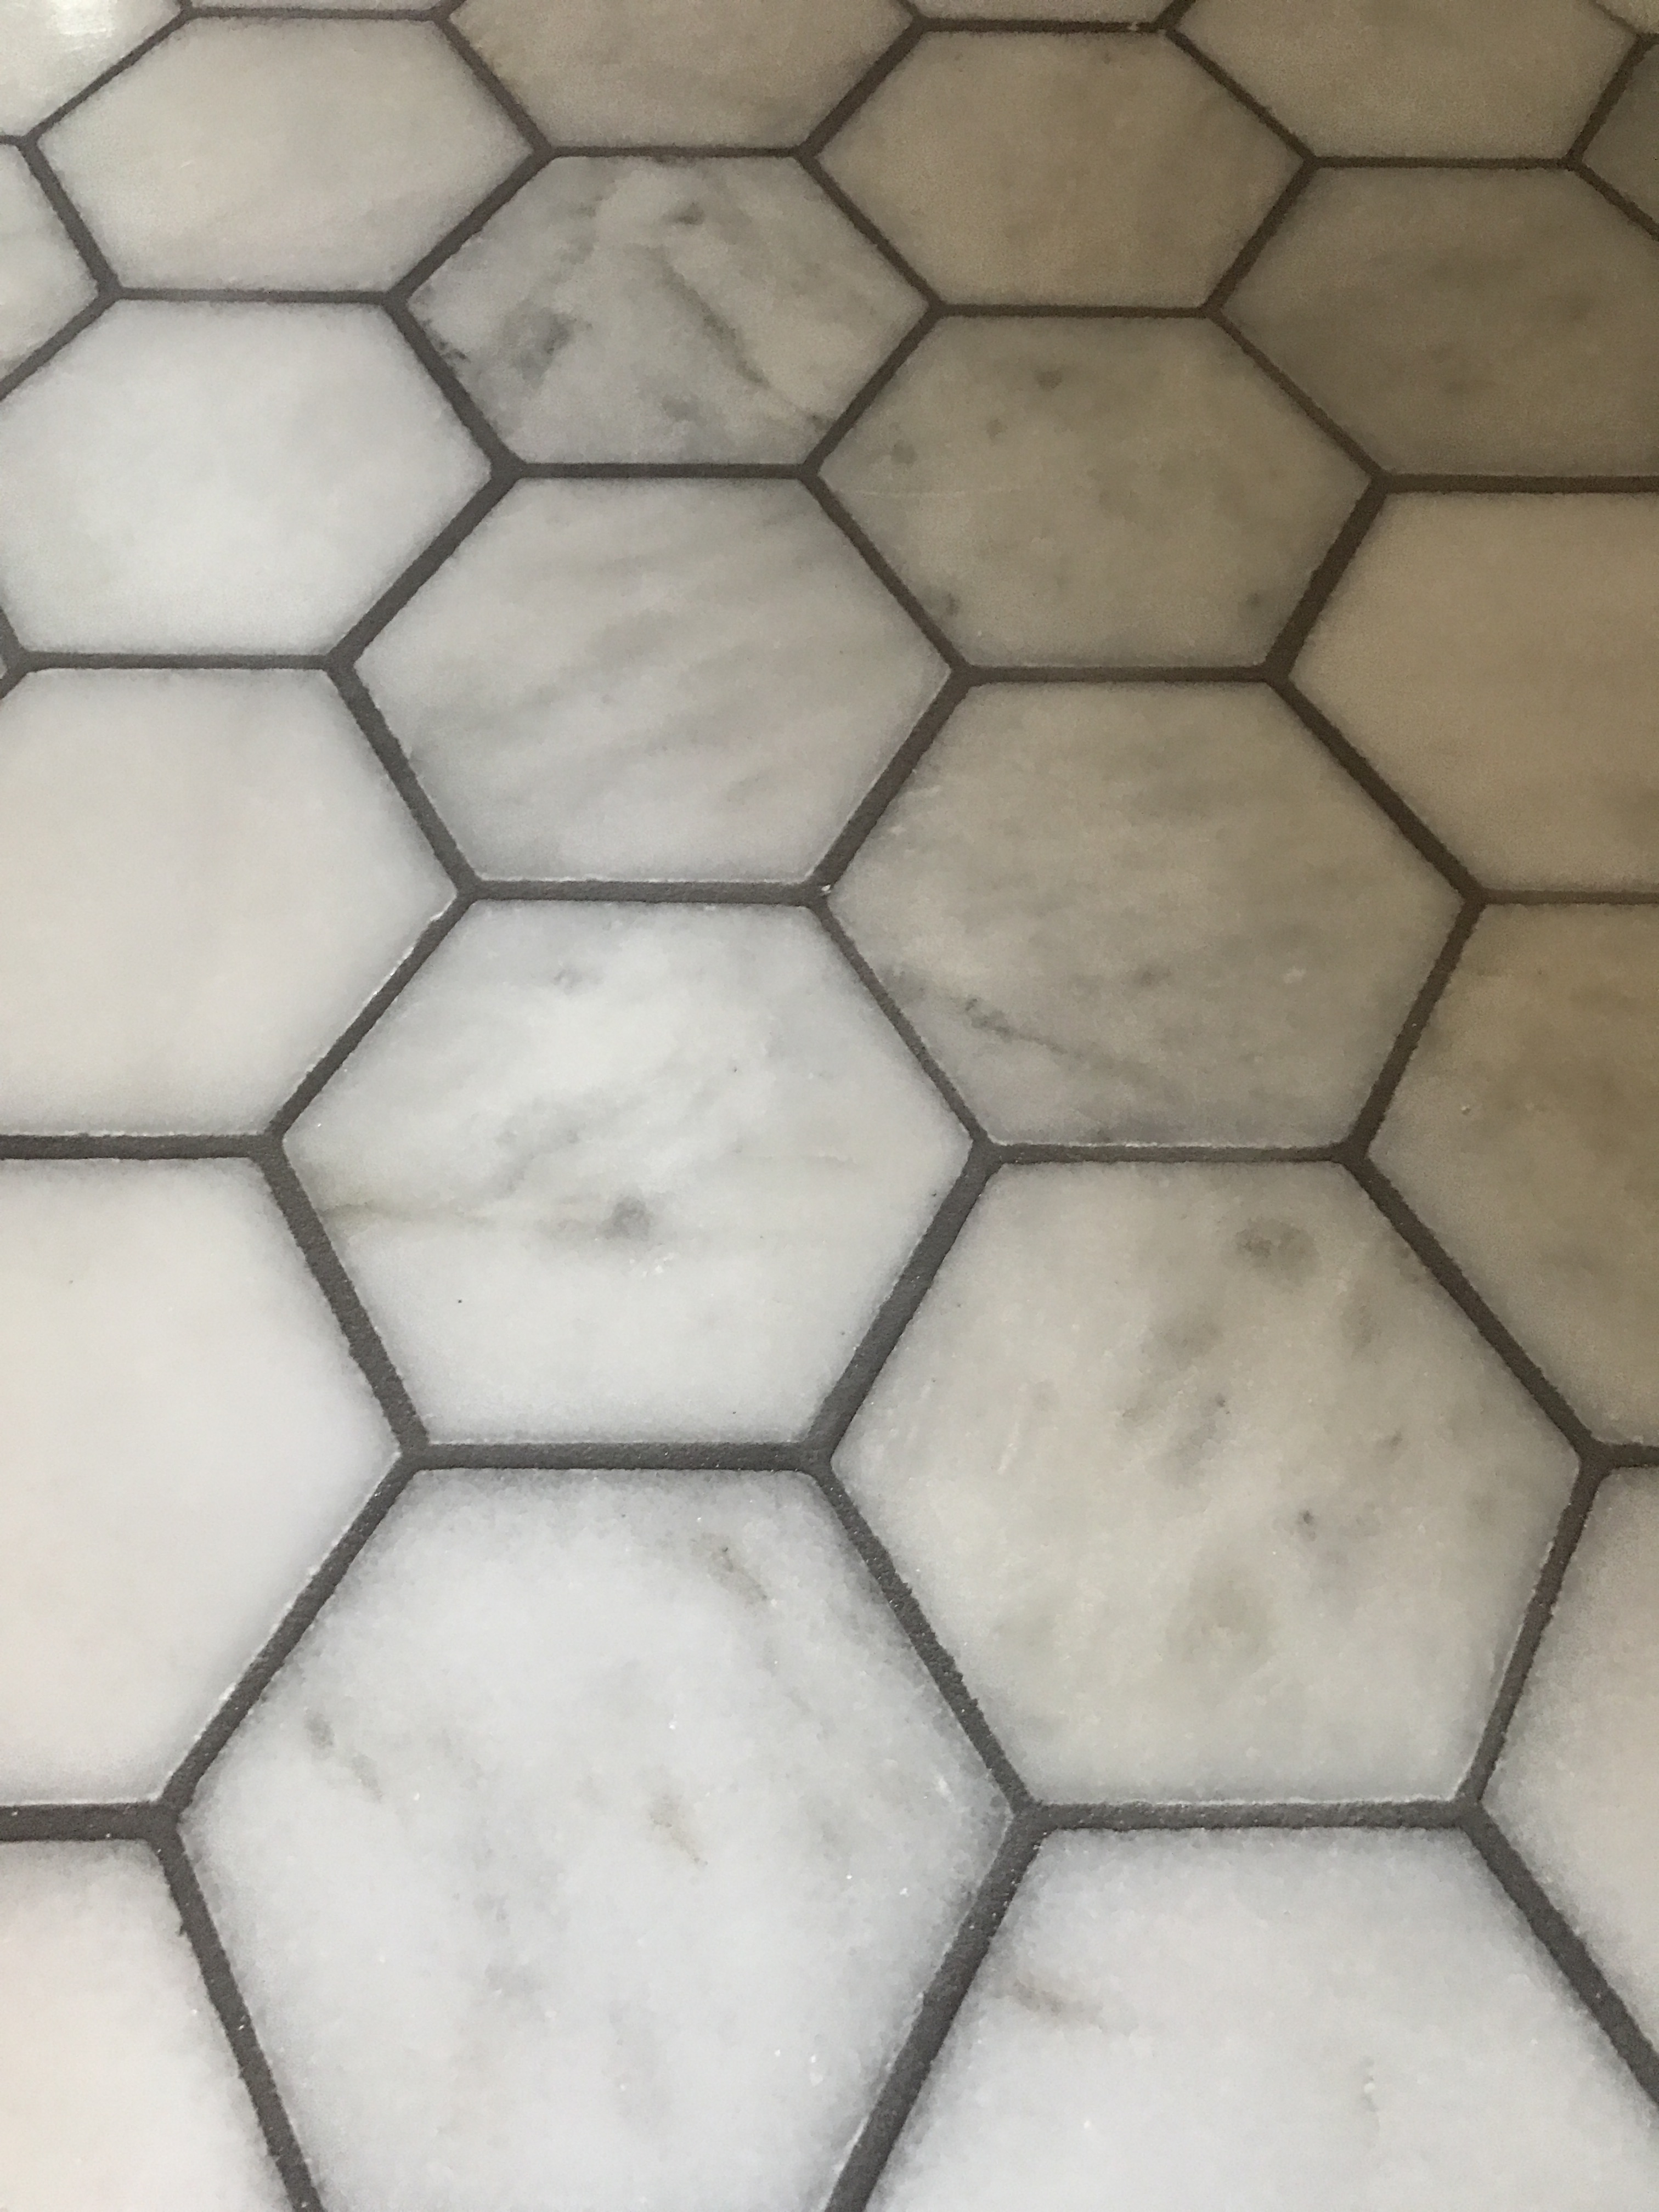
Funny story with this. Look very closely when picking the grout color. We made a mistake and accidently chose a brown grout vs. a grey because we didn’t look at the names that closely. We were able to get it fixed and cover it with a grey grout. It seems like I’m obsessed with hex, but I just fell in love with the look of this hex, which is 4 inch marble so it gives the room a different look.Ā  This is the tile in the downstairs guest bathroom which has a door making it accessible from the outdoor living space.

patio-tile

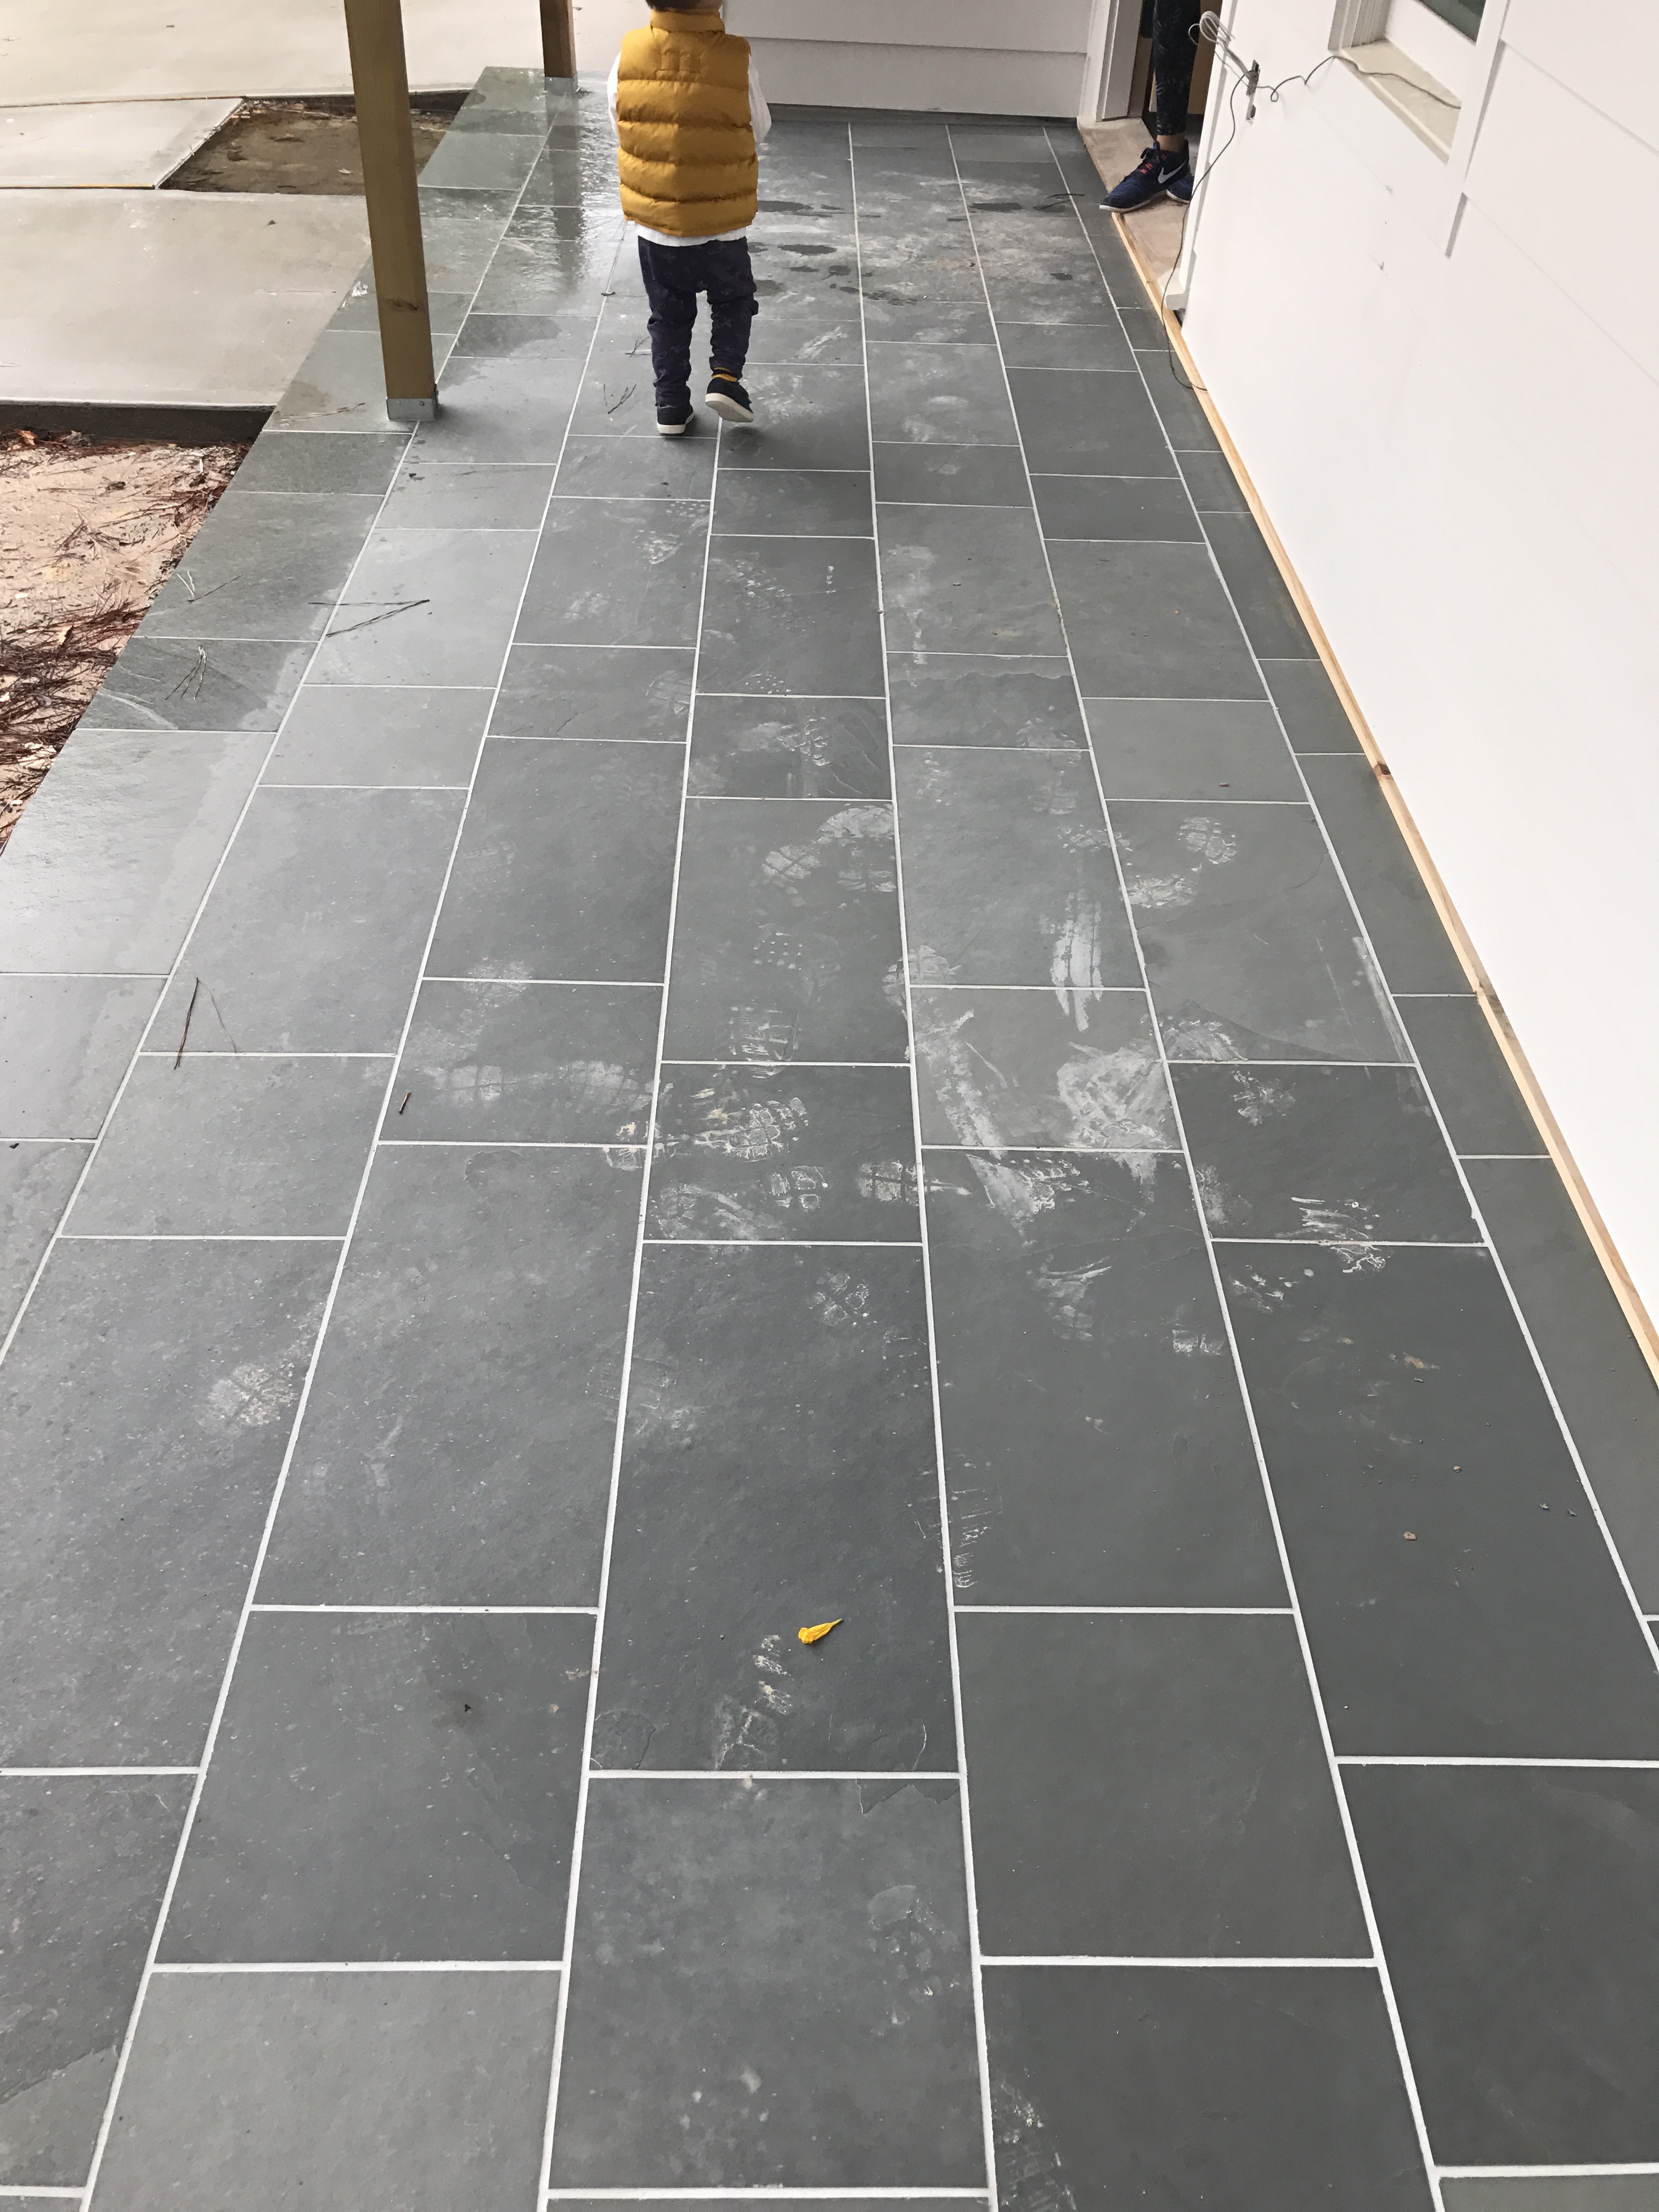
Porch tile we chose is a slate tile calledĀ  montauk blue. The tile came in 12×12 and 12×24. Originally, I picked out a differentĀ  pattern for this tile, sort of a versaille pattern, but then discovered that was going to be an incredible amount of labor when the tile folks were trying to lay it all out. Each tile would need to be trimmed to accommodate the correct amount of spacing for the grout lines, so it was going to be $$$$ . Lesson learned here: if you have a cool tile pattern in mind, talk through that thoroughly before buying the tile to make sure it will really work for the space, type of material, etc.


Save

Save

Save

Save

Save

Save

Save

Save

Home Design + Decor

Carpentry details

November 23, 2016

I hope everyone’s Thanksgiving holiday has started off great! It’s been awhile since I’ve shared an update on the Lucas family home front. In some ways it seems like a lot has happened but in other ways it seems like not much has. So many decisions have to be made on the back end and a lot of work in one area has to happen before the next piece can start. I’m share what I’ll call a carpentry update.

Carpenters have been creating the cased openings, crown molding, door trim, built-ins, and cabinets in every nook of the house. You may have seen a few posts from me here and there on Instagram but I’ve been slacking on the blog front with the #Lucasfamilyhome updates. Ben goes over there pretty much daily to see the progress and measure things to make sure they’re correct and catches things we see that might need to be changed. For instance, we realized we forgot to put an outlet in an area of the kitchen that really needed. It was a relatively easy fix, but walking through the house and thinking through all of this once or twice isn’t enough; some things just seem to get overlooked and I was actually the one who pointed this out last week. It’s like we have to make a weekly or bi-weekly punch list. Are we micromanagers? Probably. But, we’re invested in this home in every way possible, and it’s better to be as thorough as possible in my opinion.

How far are we from completion? We are probably looking at late December or early January to be totally realistic. We wanted to get in by December 1 and that’s not going to happen, and we REALLY wanted to move in by Christmas and that’s looking unlikely as well.

I’ll be back more frequently since we’re just a few weeks out. Next up, I’ll share a tile update, including my top picks if you’re going for a neutral, timeless look.


carpentry-1, Lucas Family Home

Cased opening into dining room

carpentry-1-2

Built-in bookcases upstairs

carpentry-2

Reading nook/built-in bench seating with storage at top of staircase

carpentry-3

Cabinets in kids’ bathroom

carpentry-4

Kitchen cabinets

carpentry-5

Master bathroom cabinets

carpentry-6

Kitchen area cabinets

carpentry-7

Entryway in the making

Save

Save

Save

Home Design + Decor

Insulation and Drywall

October 6, 2016

A quick update on the home front: Insulation and drywall are complete now as of a few days ago, and things were getting prepped so the trim, cased openings and other carpentry details can get started.Ā  It really takes awhile to get the drywall details finished properly and to fill and sand the walls down so they’ll be smooth as possible.

We selected a garage door, but because it’s a bit of a custom size and look, it’ll take awhile to get made. I think a temporary door of some sort will get put on soon because a lot of materials will end up getting stored in the house now. Doors were delivered this week, so those will go on soon. We made 90 percent of the decisions on the flooring and tile last week. We’re heading over there this morning to meet with the cabinet makers and draw out life size sketches of what we have come up so they can get start with making some of the shelves, cabinets an built-ins in the house. Then, we’re heading out of town for a family wedding this weekend.

More soon!

LL


The master bedroom, all the bathrooms and the laundry room where insulated for sound control.

insulation-and-drywall-39

We chose to use BIB insulation (Blown in Blanket) because it offers increased sound control and increased energy efficiency.

The white blanket gets stapled to the stud and then the insulation gets blown in to fill 100% of the space.

insulation-and-drywall-5

Master bedroom ceiling after the first day of drywall (looks pretty rough)

insulation-and-drywall-52

Master bedroom ceiling after drywall tape, mud and sanding.
insulation-and-drywall-84

Living room is starting to take shape

insulation-and-drywall-79

Save

Save

Save

Save

Save

Save

Home Design + Decor

Odds & Ends

September 19, 2016

A lot has been going on behind the scenes at the house to get it ready to before insulation and drywall. Over the past month, all the things you don’t really think about, but need to have in order to make your house function properly have been going on. So all the HVAC and electrical to do’s have really been the bulk of the work done lately and that’s hard to document. One step has to occur before the next step and inspections have to occur along the way. So, if all of this doesn’t happen in the right order, it can really throw things off.

For instance, the inspector came to the house to see if we were ready for dry wall, Ā and the gas line to the fireplace wasn’t connected. So, we failed that inspection. The inspector came back the next day first thing in the morning Ā at 8am, but the plumber didn’t come back until 8:30am. By that time, the inspection failed AGAIN and we have another day wasted. So, it’s a lot of frustration overall. I don’t know a single person who has built a house that wasn’t frustrated along the way and had delays. It’s just really frustrating when you’re in the midst of it and you look at the calendar and realize it’s nearly the fall and we thought we’d be in there by Sept. That’s definitely not happening.

We did get insulation on Saturday and drywall should happen this week. It’s been a loooooong time coming for this, and our builder tells us that typically 60-90 days after drywall is when houses get completed. We will see! I’m sharing some progress pics that we’ve taken along the way.

More decisions have to be made about interior details so we’re working on that, too. Ben met with the cabinet makers to sketch out the layout of the kitchen cabinets and closets. ( I couldn’t make this meeting.) I think we’re pretty good on the kitchen cabinets, but I’m really indecisive on my closet situation. I’m told I need to make a decision in the next two weeks how much shoe space I feel like I need. That sounds really ridiculous, I know. But, I’m really on the fence about this!

More soon,

LL


Straightening out the wall to ensure the drywall sits flat. They cut on the inward side of the 2×4Ā and shove a larger shim (aka a wedge of wood) to correct the bow. I thought this was really strange, and I don’t think it’s done in every house but apparently it’s one of those little details that makes a difference.

plumbing-electrical-hvac-144

Fireplace install

plumbing-electrical-hvac-151

Pocket door install in Braden’s bathroom upstairs. All of the other interior doors get installed after drywall.
plumbing-electrical-hvac-152

Double checking vanity light placement to reduce drywall repair.
plumbing-electrical-hvac-123


Home Design + Decor

This little light I wish you were mine

July 25, 2016

1 | 2 | 3 | 4 | 5 | 6 | 7 | 8 | 9 | 10 | 11

I mentioned in my last home post that we did a walk-through the house a few days ago to take a look at plumbing and electrical that’s been installed to date. In the bathrooms in particular, we have wire-only holes since I can’t decide at this point if I want overhead scones that have two, three or four lights vs. two single light sconces. I feel like I look at lighting online all the time, and I’m not only indecisive, but also overwhelmed by the choices, colors and options out there.Ā  I’ve also realized lighting can be quite pricey, so that’s a budget and mood killer. Womp womp.

During my hunt, I keep going back to a few that I really like, which tend to be lantern style. I already purchased this light for the mudroom, and it’s currently stored away in Ben’s closet. ( I can’t even fit another pair of shoes in my closet at this point much less a massive box with a lantern in it!) I also seem to gravitate toward non-traditional bulbs.

All that said, I’ve rounded up a few of my top lighting picks. I think a big part of my style is traditional and Southern, so maybe that’s why I love lanterns. They seem welcoming and remind me a bit of Louisiana and Charleston, SC, which have some of the most charming and beautiful homes in my opinion.

I am a big fan of these kitchen island lanterns.

I am a big fan of these kitchen island lanterns. Picture found on Pinterest via decorpad.com/2013 Southern Living Show House.

I’ve gathered even more picks on my lighting board on Pinterest, so check that out if you’re interested in seeing more. If anyone has any suggestions for places to find lighting, I’m all ears! And, if they’re affordable, then that’s even better. šŸ˜‰

More soon,

LL

Save

Save

Save

Save

Save

Save

Save

Save

Save

Save

Home Design + Decor

Lucas Family Home Update: Details that make a difference

July 20, 2016

I get a lot of questions from friends and family about the progress of our home. Well, this is the latest: Things are coming along nicely and a lot of progress has happened over the past couple of weeks. Almost all of the windows have been installed. As you may recall, we had a little window snafu, and we’re still awaiting a few of the custom windows. That said, the windows on the front porch are getting trimmed out to have more substantial molding around them, which makes a big difference from a curb appeal standpoint.

Another change that happened recently was the master bedroom ceiling got vaulted. This should have happened originally, but it got overlooked so it had to be redone. Vaulting the ceiling made a HUGE difference and it really made the room feel more spacious, so I’m pretty happy with that.

The plumbers came by this week and added in all the plumbing. It’s like a massive maze of pipes and tubes. The heart of the plumbing looks monstrous, and Ben tells me this is very important. (I just nod.)

We did a walk-through with our builder this week to go through the lighting and electrical plans. I’m glad we did this, as we caught a couple of little things that we forgot on the plans/sketches. For instance, I almost forgot to make note of a electrical outlet that will be housed within my vanity drawer for my blowdryer and curling iron. This seems ridiculous, but this is something I’ve always wanted so I can keep my stuff off the counters and keep things looking a little less cluttered. The details, y’all – they’re important!

More soon,

LL

Windows (111) 
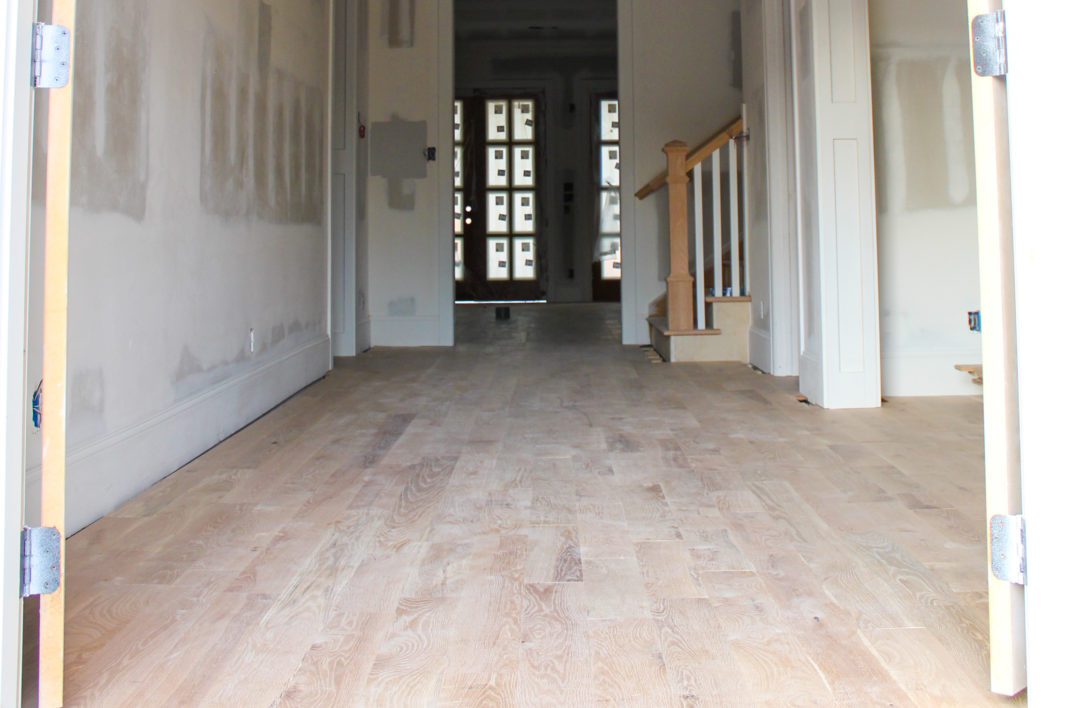
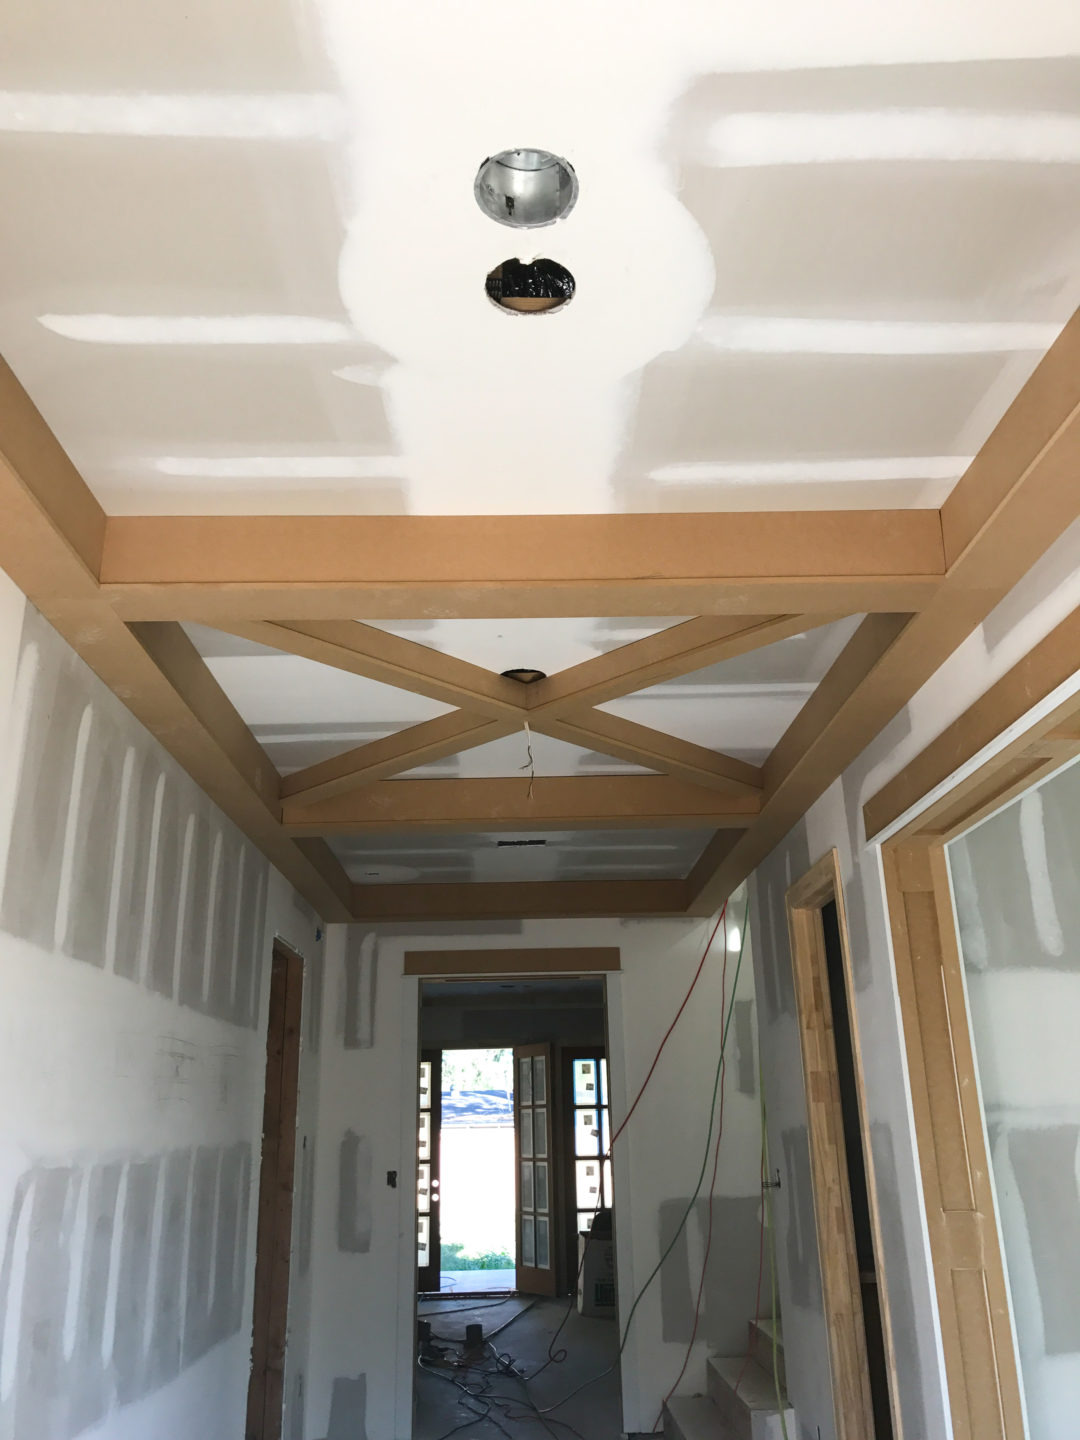
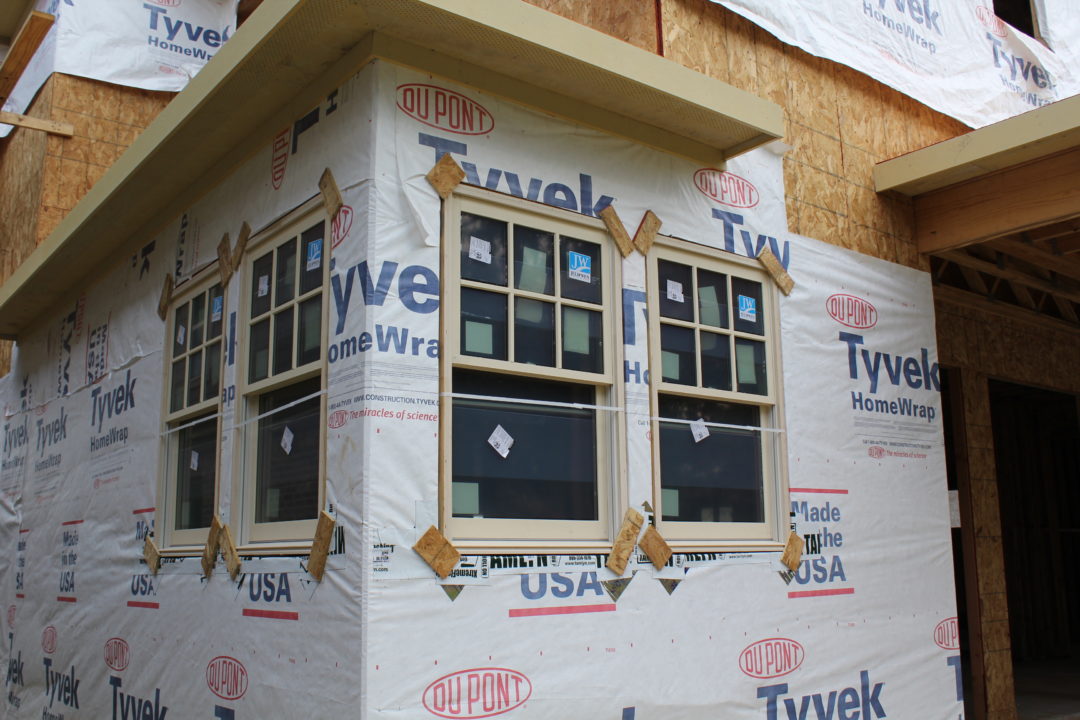
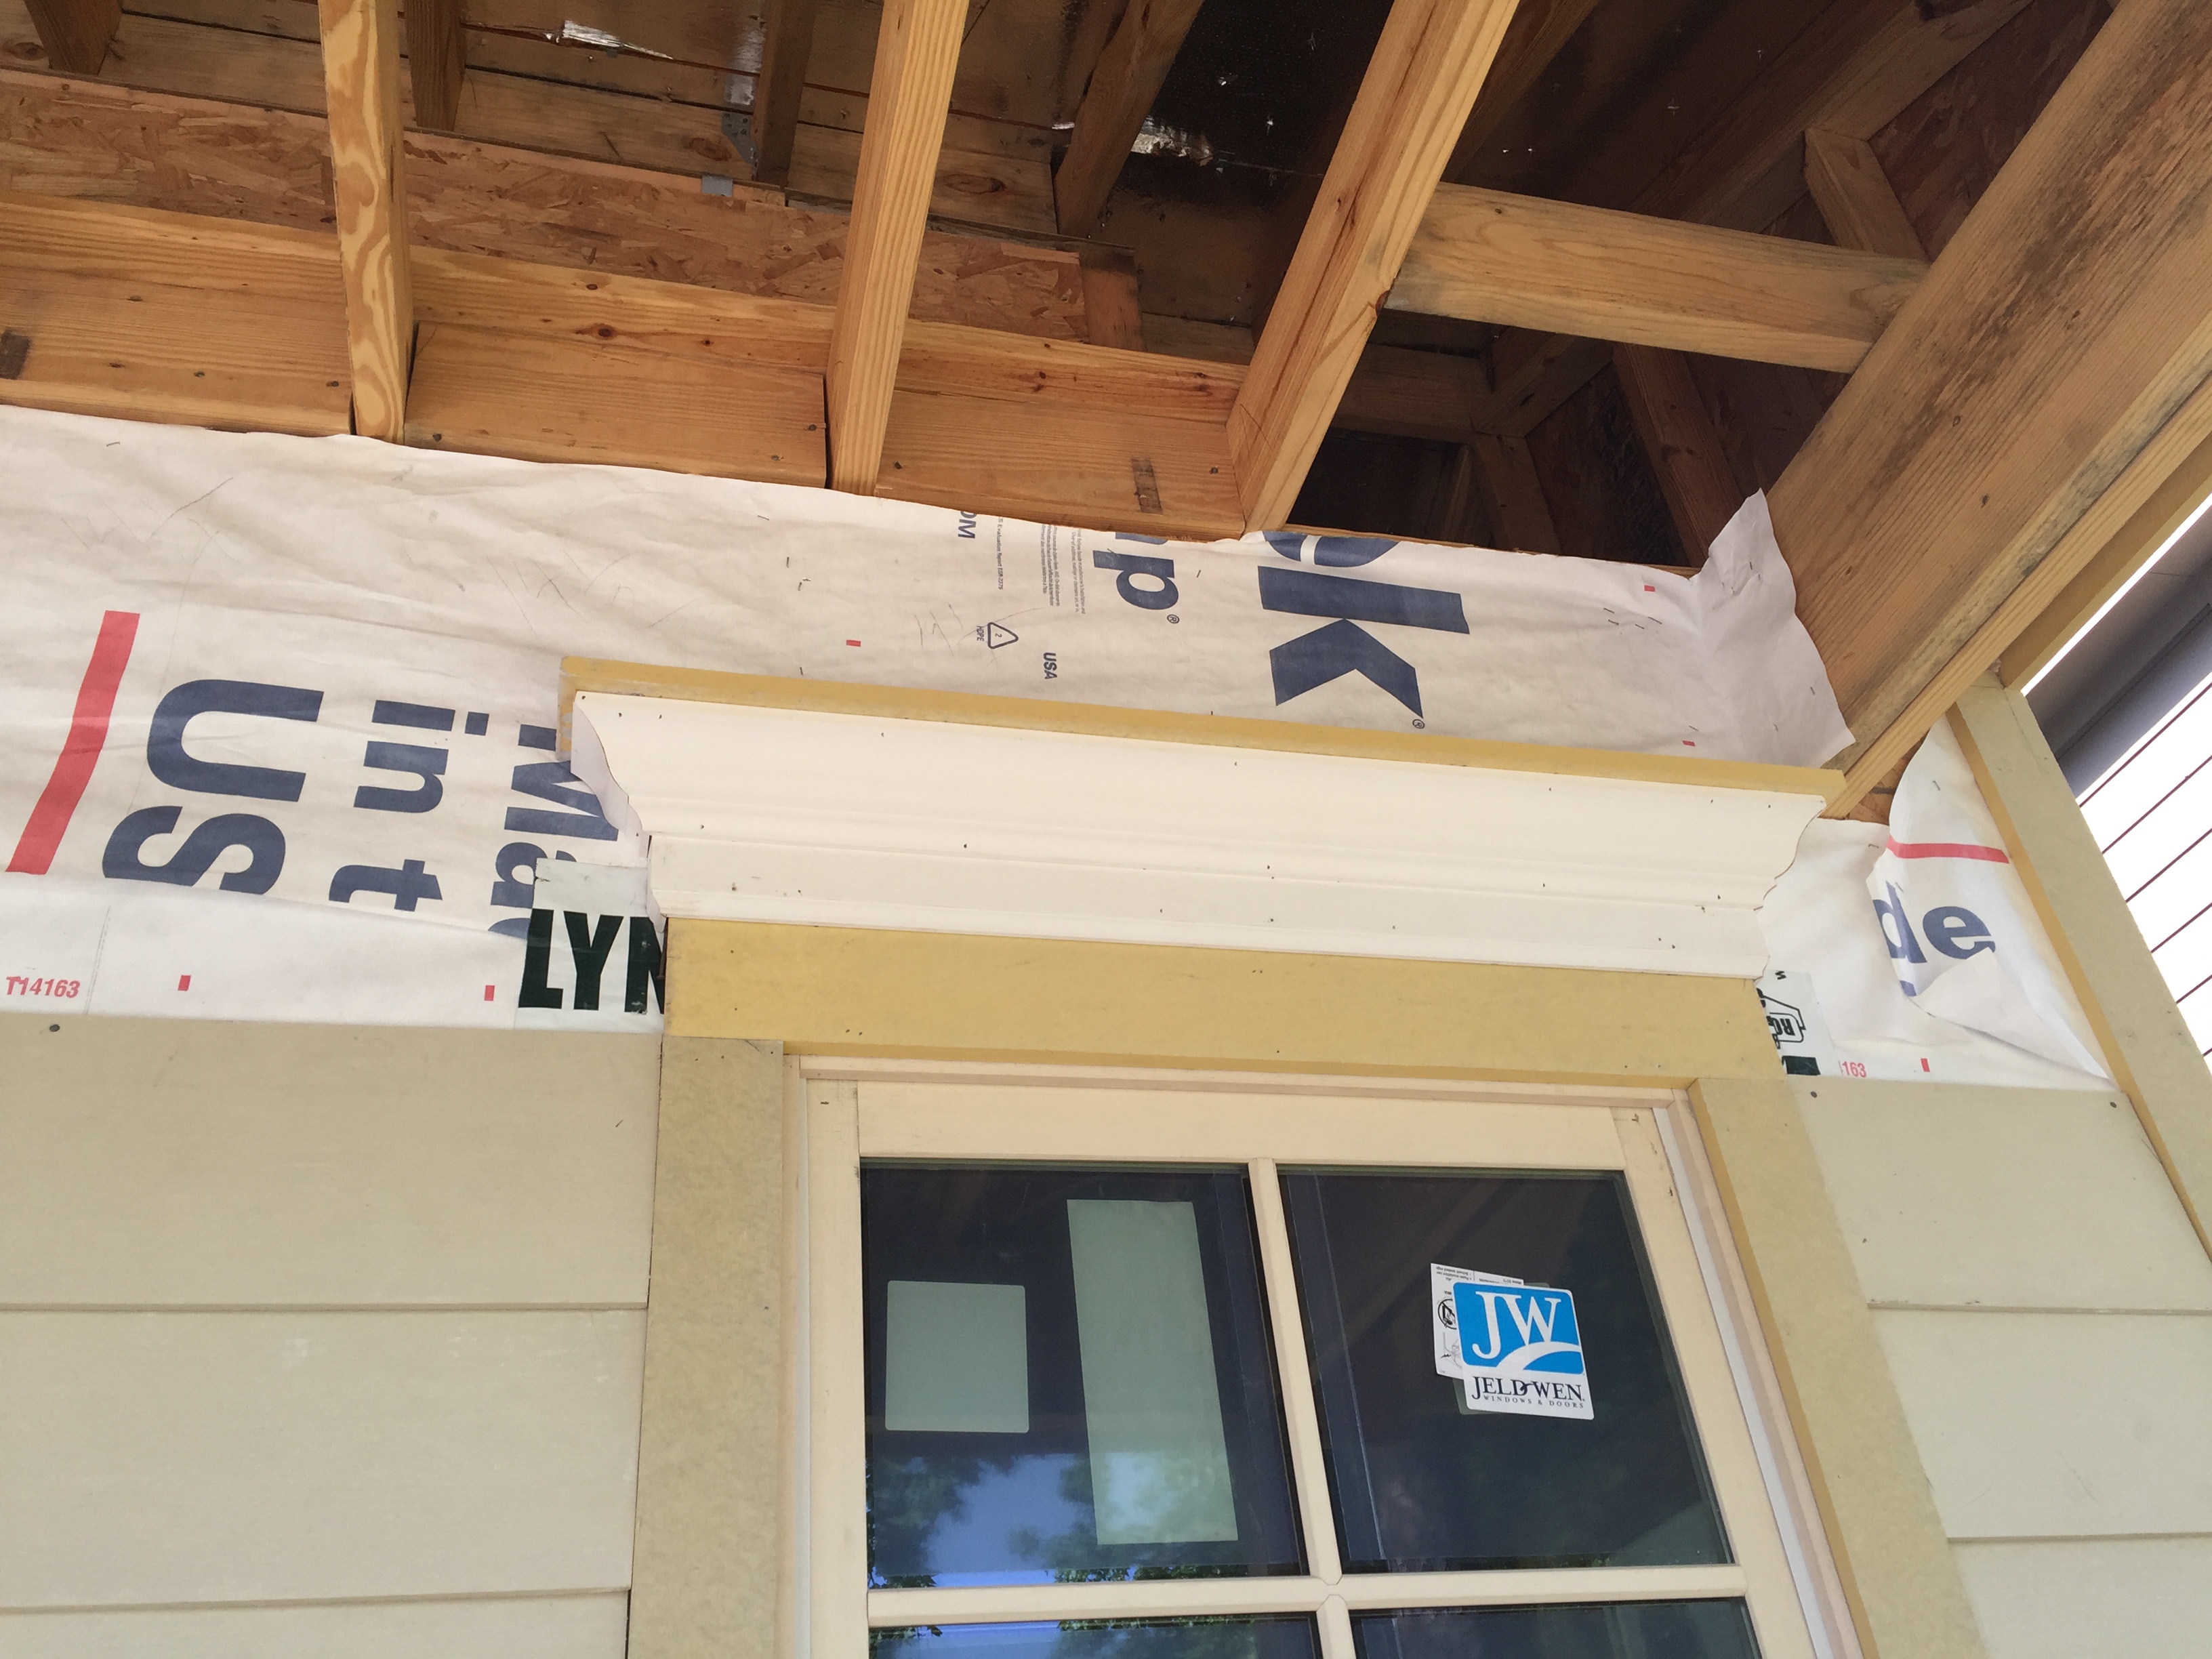
The windows in the front of the house needed a little “oomph” so framing them out with nice trim made a huge difference.
IMG_1664

The heart of the plumbing. Each fixture has its own dedicated line and this helps with water pressure.

Save

Save

Save

Save

Save

Save

Home Design + Decor

Windows… well at least some of them

July 6, 2016

Windows are beginning to get installed this week, which makes this house feel like, well, a house. I’m pretty amazed at how each piece makes things feel very different.

Late last week, Ben went by the new house during lunch since he likes to micromanage things (we’re probably the worst clients ever…two super detail- oriented people. Or maybe, we’re the best people to build a home?!) and noticed that many of the windows delivered were all the wrong color. Some of our windows are vinyl — the ones on the back or sides of the house. But, many of them are wood, particularly the ones on the front of the house or other areas that we wanted a more custom, cross-hatch look such a the breakfast nook.

So, we basically had a ton of almond-colored windows delivered. This isn’t good when you ordered white ones, plus we’re leaning toward having a whiteĀ  house. For a good hour, we thought thousands of dollars were going to be wasted and Ben was trying to figure out if there was any way to paint vinyl windows or get them returned. Plus, all these windows were sitting in the house and a crew was scheduled to come out and install them that afternoon. After a few calls, we discovered the window company was the one at fault. So, that was good news but it obviously has caused some delays with window installation since some of the windows need to be custom made.

So, we’re a few days delayed now, but at least we’re getting the windows we want.

More (windows) soon,

LLWindows (27)

Windows in the breakfast nook area

Windows (29)

Home Design + Decor

Lucas Family Home Update: Sheeting and more

June 30, 2016

I took a little hiatus from updating on the blog because…well, life. Something’s got to give. I need to be a better planner when it comes to this whole blog thing, but I’m not quite there yet. Bear with me, please.

We’ve had a lot of progress on the home front in the past two weeks since my last post on the framing. We have sheeting now. The plywood sheeting material stabilizes the house so it doesn’t collapse from the wind. That’s about my level of expertise on that subject.

With a custom house, you have to be flexible and willing to roll with changes that come your way. There have been some changes due to engineering vs. architectural plan differences. Therefore, we had to alter the roof line a tad.

2 Sheeting (30) 2 Sheeting (29)


2 Sheeting (50)

Then, the eaves, soffits and roof sheeting were completed. Soffits are the material forming a ceiling from the top of an exterior house wall to the outer edge of the roof, i.e., bridging the gap between a home’s siding and the roofline, otherwise known as the eaves. (thanks, Wikipedia.)

We are now ready for windows, doors, siding and shingles, which should come in the next week. It’s starting to look like a real house!

Behind the scenes, we’ve finalized plans forĀ  light fixtures and electricity since that will be installed next. I may have bought a light fixture already because I came across a sale online for one I really liked. Online shopping is the best. šŸ™‚ We also had to make a decision on a range and purchased that as well. We’re starting to acquire a lot of stuff. And, we really need to plan for our move out of our current house and purge. Details, details.

I’m aiming to make a schedule over the weekend to get a little organized when it comes to our current home because we’ve just been going a mile a minute and haven’t been purging and organizing as much as we should. Maybe if I tackle a little per week it won’t feel so overwhelming, right? Things are a little overwhelming right now, especially with a 23 month old speaking to you and saying thingsĀ  but you have no idea what he means, then he gets frustrated because you don’t know what he’s saying.Ā  But, the constant “mama, I wuv yooouu” makes up for it.

More soon,

LL

42